I’ve been writing a lot of command-line apps to try out .NET Core and now .NET 5. There’s always a lot of repeated code to setup the application, parse the command-line arguments, and then map those to operations performed by the program. I started researching some frameworks for building command-line interfaces (CLI) and there are quite a few out there for .NET.
- Spectre.Console.Cli – an extremely opinionated command line parser targeting .NET Standard 2.0.
- CliFx – simple to use, yet powerful framework for building command line applications. Its primary goal is to completely take over the user input layer, letting you forget about the infrastructure and instead focus on writing your application.
- PowerArgs – converts command line arguments into .NET objects that are easy to program against. It also provides a ton of additional, optional capabilities that you can try such as argument validation, auto generated usage, tab completion, and plenty of extensibility.
- Cocona – micro-framework for .NET Core console application. Cocona makes it easy and fast to build console applications on .NET Core.
They all have their strong points, but I decided to dig into Spectre.Console.Cli because the project has good support online and ongoing recent development. It also comes with a rich CLI layout/markup library to make our console applications look pretty with color, grids, and tables.
This chapter is going to focus on the basic concepts of the Spectre.Console library to help get started. In following chapters, I will build a bigger end-to-end sample application that shows the concepts in the context of a larger application.
Source Control
All of the sample code in this tutorial series will be hosted in Azure DevOps. You will be able to find all of the code divided per lesson: https://dev.azure.com/d20Tek/Tutorials/_git/command-line-tutorial.
In the tutorials folder, you will see a project per folder named Cli.Lesson1.x. These folder names will match our lesson titles here, so it will be easy to follow along.
You can either type all of the classes and code in the lessons or get the code from the repository, whichever works better for you. Repository link: Cli.Lesson1.1 – Repos (azure.com).
Project Creation and Setup
The project creation steps in this section will be repeated in numerous lessons, so we should make ourselves familiar with the steps and setup. We’re only going through the detailed steps in this lesson and just link back here in future lessons.
1. Start by creating a new Console App (.NET Core) through the new project dialog.

For this lesson, the project name should be Cli.Lesson.1.1 in the ‘tutorials’ folder. Then click the Create button.
2. This will create a simple project with the default program.cs file… with an empty Main function.
3. Update the project properties by right-clicking the project (Cli.Lesson1.1 node) in the solution explorer. In the context menu, select the ‘Properties” item.

4. In the Project Properties window, change the following data and save the file:
- Assembly name: lesson (to make it easier to use from command line across different lessons, we will set a short name to use for the executable).
- Default namespace: Cli.Lessons (use the same namespace across our tutorial projects, so that code can be copied between them easily).
- Target framework: .NET 5.0 (the project template still default to .NET Core 3.1, so we want to upgrade to the newly released .NET 5).
5. Next, we need to add a reference to the Spectre.Console NuGet package (version 0.36.0 or above). In the solution explorer, right click on the Dependencies node and select the ‘Manage NuGet Packages’ item.
6. In the NuGet Package Manager, search for the Spectre.Console package.

Select the Spectre.Console from the results list and then click the ‘Install’ button. There may be some license and verification dialogs, please accept those as well.
With the project created, its properties updated, and the Spectre.Console package installed, we’re ready to start coding our first command-line application.
Spectre.Console.Cli Hello World
The Spectre.Console.Cli library makes use of the Command pattern. It parses the command-line arguments passed into the executable and maps those arguments into commands and options (or settings) in our source code. The first code we’re going to write is a command that simply prints a hello message.
First, create a new ‘Commands’ folder in the project. In real-world projects, we will likely have many commands, so let’s start off on the right path by providing a folder for commands.
Then, right click that folder and select ‘Add > Class’ for the HelloCommand.cs class file. Update that file with the following code:
using Spectre.Console.Cli;
using Spectre.Console;
using System.ComponentModel;

namespace Cli.Lessons.Commands
{
    public class HelloCommand : Command<HelloCommand.Settings>
    {
        public class Settings : CommandSettings
        {
            [CommandOption("-n|--name <NAME>")]
            [Description("The person or thing to greet.")]
            [DefaultValue("World")]
            public string Name { get; set; }
        }

        public override int Execute(CommandContext context, Settings settings)
        {
            AnsiConsole.MarkupLine($"Hello [bold yellow]{settings.Name}[/]!");
            return 0;
        }
    }
}
- We define the
HelloCommandclass (line #7) to derive fromCommand, which also takes a type for theCommandSettingsused by this command. - The
Commandis a base class defined by the Spectre.Console.Cli. It defines Commands as the basis of process control in the command-line application. - Next we define the
Settingsclass as a nested class (line #9). Because this setting is only used by theHelloCommand, so we can just define it in this way. However, Spectre.Console.Cli allowsCommandSettingsto the defined separately so that they may be shared between commands. - Note this class derives from
CommandSettingclass — the Spectre.Console.Cli base for all command options. CommandSettingclasses are simple data classes that define properties that will be used as options in the command-line argument.- For the
HelloCommand.Settings, we define a single property calledName(lines #11-14). And we use attributes to define behavior of this property.CommandOption– defines a template for the option, include the long and short identifier in the arguments (-n and –name in this case). So if the command-line arguments includes ‘hello –name Test’, this will map to theHelloCommandwith theSettings.Nameproperty set to Test.Description– descriptive text used by the Spectre.Console.Cli library to produce help text for this command option.DefaultValue– specifies the default when the command option is not specified in the command-line arguments. In this case if no name is specified, theNameproperty defaults to ‘World’.
- Finally, we override the virtual
Executemethod (lines #17-21), which is called whenever our command needs to be run. This method gets theCommandContextandSettings(defined above). The settings parameter is initialized with the parsed data for the command options (or default values). - The
Executemethod just simply writes out to the console – “Hello {settings.Name}!”… saying hello to whatever name is in theSettingsclass. - To display richer text, we use
AnsiConsole(provided by the Spectre.Console library that makes it easier to create beautiful console applications). ThisAnsiConsolehas simpleWrite/WriteLinemethods (like the default System.Console class), but also providesMarkup/MarkupLinemethods to display text with a markup language to define how text is displayed. For example, our code shows theSettings.Nameproperty bolded and in yellow.
We will dive much deeper into the capabilities of the Spectre.Console library, but in the meantime you can read more about its features and markup capabilities here.
Finally, we need to update the program.cs file to configure and startup the ConsoleApp class in the Main method.
using Cli.Lessons.Commands;
using Spectre.Console.Cli;

namespace Cli.Lessons
{
    class Program
    {
        public static int Main(string[] args)
        {
            var app = new CommandApp();
            app.Configure(config =>
            {
                config.ValidateExamples();

                config.AddCommand<HelloCommand>("hello")
                    .WithDescription("Say hello to anyone.")
                    .WithExample(new[] { "hello", "--name", "DarthPedro" });
            });

            return app.Run(args);
        }
    }
}
- First, we create an instance of the
CommandAppclass (line #10). - Then, we configure the app with the supported commands. For this initial example, that’s just the
HelloCommand. - The
ValidateExamplescall (line # 13) ensures that all examples used in the configuration are valid. If there are errors in the data specified inWithExamplecalls, then this method will throw an exception prior to the end of theConfiguremethod. - The
AddCommandcall (line #15) takes theHelloCommandas its type and name used in the command arguments processing. The name used here (“hello”) does not need to match the name of theCommandclass (but it usually will). - The
WithDescriptioncall (line #16) gives descriptive text to this command, which is used in theCommandApp'shelp command. - The
WithExamplecall (line #17) provides an example of command-line parameters used to show an example call in the help text. This data is what gets verified by theValidateExamplescall above. - Finally, we call the
app.Runmethod with the command-line parameters. The run method processes the command-line parameters, finds the appropriate commands and settings/options, and runs them.
That’s all we need for our simple command-line application. Of course there’s some overhead for such a simple example, but as we build out more complex examples and multiple commands, we will see the true power of use the Spectre.Console.Cli library.
Building and Running the App
With all of the code in place, we can build and run the application. In Visual Studio, pressing F5 will start debugging the app. If we do that, we will see the following screen:

Debugging launches our command-line app with no arguments, so the default behavior of ConsoleApp is to show the help text for the app. As we can see, the help text shows the descriptions and examples we defined in our configuration.
To test the app with multiple command-line arguments, we’re going to launch the Windows command prompt and run some examples:
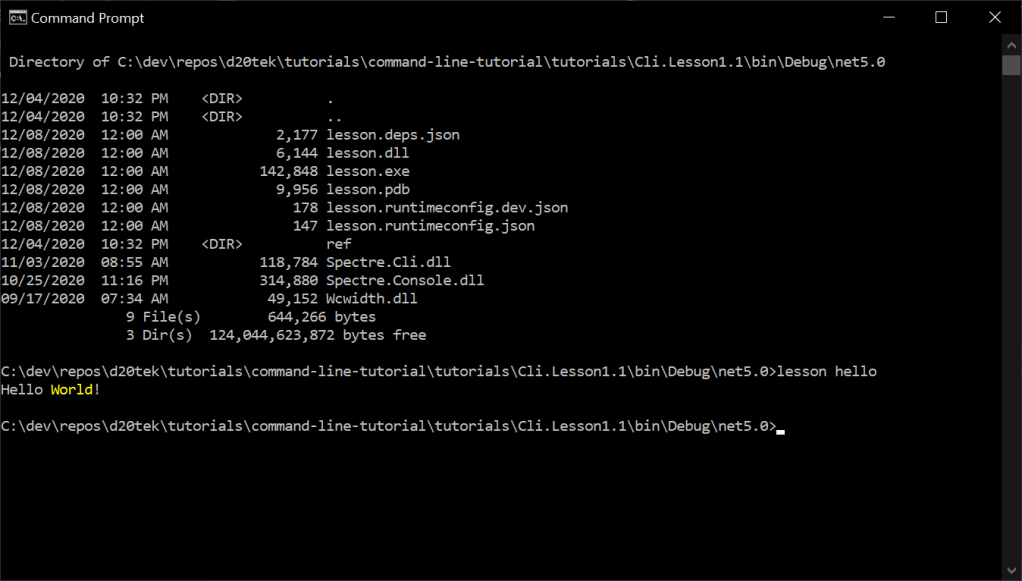
1. Run ‘lesson hello’ (recall that we named the project executable to be lesson.exe). Using just the hello command, the program runs with the default value for the Name settings to display ‘Hello World!’.
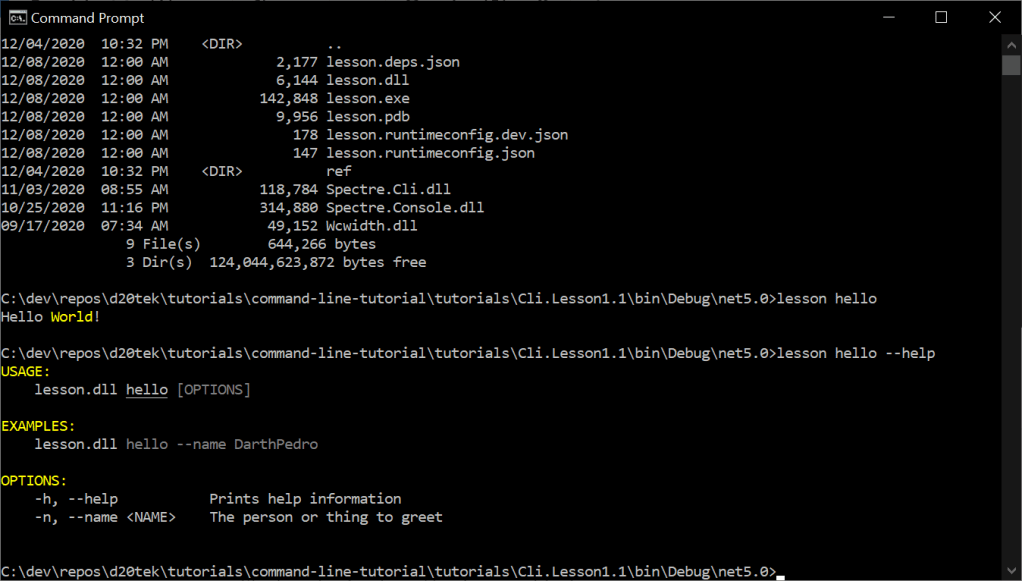
2. We can see the help text for the Hello command by using the following command option: lesson hello –help.
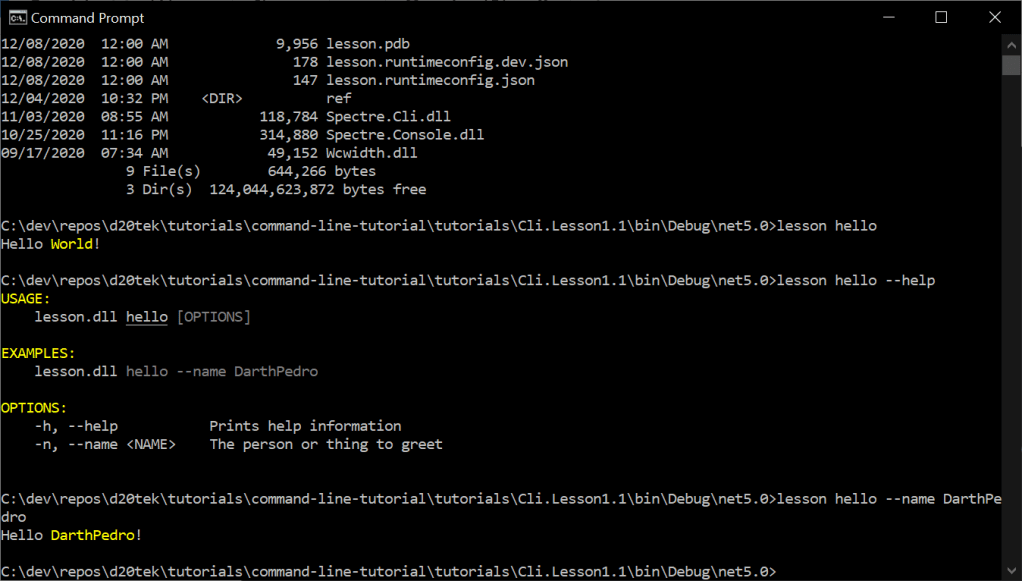
3. Now we can pass a –name option to display that text in the message: lesson hello –name DarthPedro (produces – Hello DarthPedro!).
We can try different variations of calling the Lesson app using the option short names, like -n for –name and -h for –help. And if we try arguments that don’t map to known commands, the ConsoleApp will display error messages for those arguments.
As we can see, the Spectre.Console.Cli ConsoleApp provides some basic functionality to display help text about the available commands in the program. And it parses and processes the command-line arguments to map those items into specific commands and options based on the code defined in the project. The command and settings code we write are what is necessary to produce our program’s logic. And we don’t have to build any boilerplate code to handle arguments, errors, or command help screens.
In the next lesson, we will look at a program with multiple commands and the ability to define a default command.
Note: These used to be two separate packages (Spectre.Console and Spectre.Cli), but the have been combined for easier development and support. If you use Spectre.Console prior to version 0.36.0, then this sample code will not work. You can either upgrade the to the latest Spectre.Console package, or include the corresponding Spectre.Cli package.

7 thoughts on “Lesson 1.1: Starting with Spectre.Console.Cli”