Having one command, like we did in our first lesson, is useful but limited. With Spectre.Console.Cli, we can define multiple commands, each with their own arguments and options, and each getting called when the user specifies that command in the command-line arguments. So let’s take a look at defining multiple commands and a default command for your app.
Reminder: you can find the source for this lesson in our Azure DevOps repo: Cli.Lesson1.2 – Repos (azure.com).
First, let’s start by creating a new Console App in Visual Studio named Cli.Lesson1.2… review project creation in Lesson 1.1, for the full details on getting setup.
Defining Multiple Commands
Like we did previously, let’s create a Commands folder in the new project. Then in that folder, we will re-create the same HelloCommand:
using Spectre.Console.Cli;
using Spectre.Console;
using System.ComponentModel;

namespace Cli.Lessons.Commands
{
    public class HelloCommand : Command<HelloCommand.Settings>
    {
        public class Settings : CommandSettings
        {
            [CommandOption("-n|--name <NAME>")]
            [Description("The person or thing to greet.")]
            [DefaultValue("World")]
            public string Name { get; set; }
        }

        public override int Execute(CommandContext context, Settings settings)
        {
            AnsiConsole.MarkupLine($"Hello [bold yellow]{settings.Name}[/]!");
            return 0;
        }
    }
}
The detailed description of the HelloCommand can be found in Lesson 1.1.
Then, we create a second command called ByeCommand (also in the Commands folder):
using Spectre.Console.Cli;
using Spectre.Console;

namespace Cli.Lessons.Commands
{
    public class ByeCommand : Command
    {
        public override int Execute(CommandContext context)
        {
            AnsiConsole.WriteLine("Okay, Byeeee!!!");
            return 0;
        }
    }
}
This is an easier command, with no arguments or options, that simply writes a good-bye message. We are purposefully starting with commands that have minimal code to focus on understanding the Spectre.Console.Cli capabilities.
Finally, we need to update the Program.Main method to create the ConsoleApp, configure both commands, and then run the app.
using Cli.Lessons.Commands;
using Spectre.Console.Cli;

namespace Cli.Lessons
{
    class Program
    {
        public static int Main(string[] args)
        {
            var app = new CommandApp();
            app.Configure(config =>
            {
                config.ValidateExamples();

                config.AddCommand<HelloCommand>("hello")
                    .WithAlias("hi")
                    .WithDescription("Say hello to anyone.")
                    .WithExample(new[] { "hello", "--name", "DarthPedro" });

                config.AddCommand<ByeCommand>("bye")
                    .WithDescription("Says goodbye.")
                    .WithExample(new[] { "bye" });
            });

            return app.Run(args);
        }
    }
}
As we can see, the Main method code is very similar to what we defined in the previous lesson:
- Line #10 defines the
Spectre.Console.Cli.ConsoleAppfor this program. - Lines #15-18 configures the hello command, like we did in the previous lesson with a description and a usage example.
- Line #16
WithAliasallows us to define another keyword that can be used in the command-line arguments that will also map to thisHelloCommand. In this code, call the app with eitherlesson hello -n Meorlesson hi -n Meinvokes the same command. - Lines #20-22 configures the bye command in the same way… this code should be starting to look familiar.
- Finally, line #25 runs the command-line app.
Let’s build and run our command-line app to see how it behaves now.
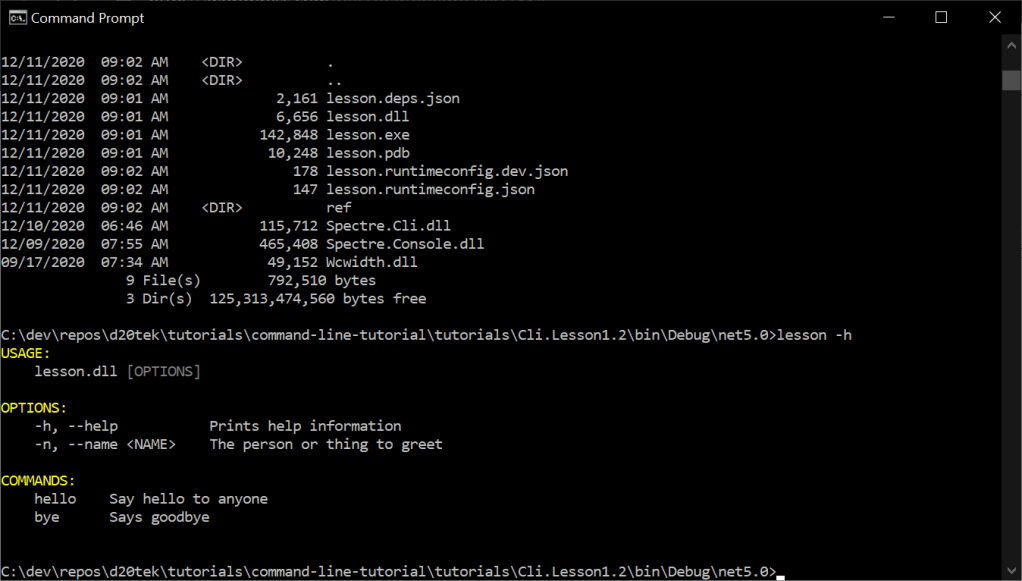
1. If we just run the command: lesson -h, we will see the help for the new app. This help text includes descriptions for both commands now.
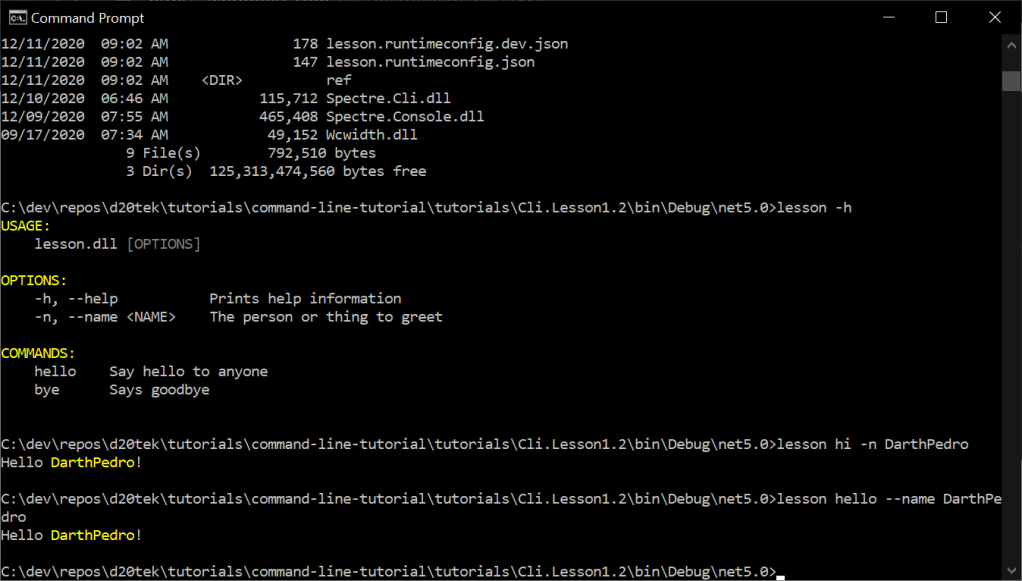
2. Run the commands: lesson hi -n DarthPedro and lesson hello --name DarthPedro. We will see that we get the same behavior.
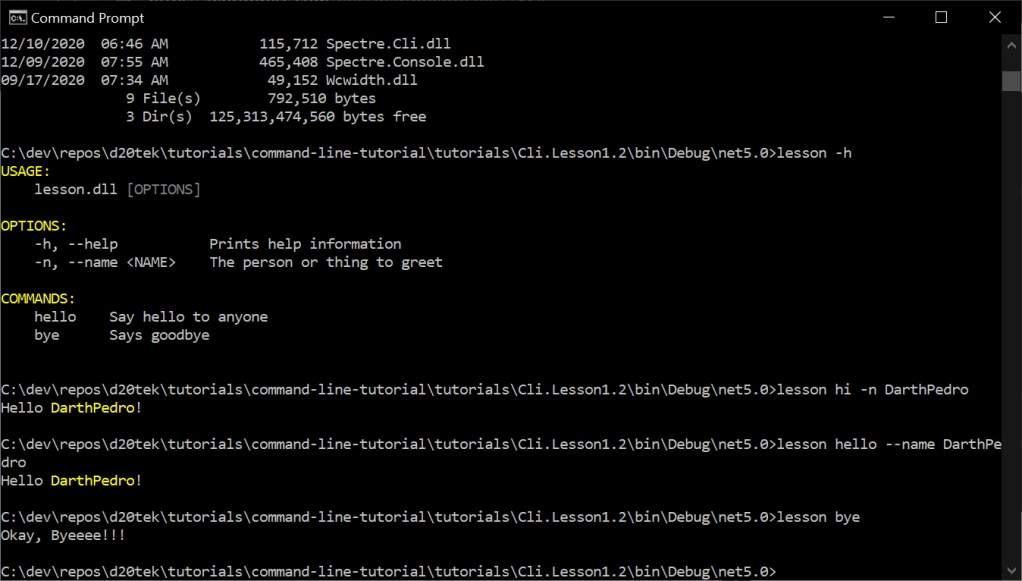
3. Let’s see the bye command: lesson bye.
As we can see multiple commands can be coded and processed by the command-line app, providing control flow for you application based on the arguments.
Specifying a Default Command
In our current command configuration, if the user just runs that app with no arguments, the ConsoleApp behavior is to show the help text for the app root commands. However, we can also specify a default command to run in when no command is specified.
using Cli.Lessons.Commands;
using Spectre.Console.Cli;

namespace Cli.Lessons
{
    class Program
    {
        public static int Main(string[] args)
        {
            var app = new CommandApp<HelloCommand>();
            app.Configure(config =>
            {
                config.ValidateExamples();

                config.AddCommand<HelloCommand>("hello")
                    .WithAlias("hi")
                    .WithDescription("Say hello to anyone.")
                    .WithExample(new[] { "hello", "--name", "DarthPedro" });

                config.AddCommand<ByeCommand>("bye")
                    .WithDescription("Says goodbye.")
                    .WithExample(new[] { "bye" });
            });

            return app.Run(args);
        }
    }
}
We do this by just specifying the default command type (HelloCommand in this case) in the generic version of the CommandApp class. Now, if we just call our command-line app: lesson, the HelloComand.Execute gets called with the default Settings.Name.

We can also call it with the –name option too (lesson --name DarthPedro).

Finally, rather than using the generic CommandApp with the default command type, we can instead define the default command by calling the CommandApp.SetDefaultCommand method.
using Cli.Lessons.Commands;
using Spectre.Console.Cli;

namespace Cli.Lessons
{
    class Program
    {
        public static int Main(string[] args)
        {
            var app = new CommandApp();
            app.SetDefaultCommand<HelloCommand>();

            app.Configure(config =>
            {
                config.ValidateExamples();

                config.AddCommand<HelloCommand>("hello")
                    .WithAlias("hi")
                    .WithDescription("Say hello to anyone.")
                    .WithExample(new[] { "hello", "--name", "DarthPedro" });

                config.AddCommand<ByeCommand>("bye")
                    .WithDescription("Says goodbye.")
                    .WithExample(new[] { "bye" });
            });

            return app.Run(args);
        }
    }
}
If we run the same commands above, we will see the exact same behavior. So there are a couple of ways to set the default command for our app.
Hidden Commands
It is also possible to have hidden commands that will be processed but are not displayed in the help text. These commands can be for power users or to provide some private functionality until we are ready to make it public for everyone. To do this, there is an IsHidden method for command configurations.
First, let’s create a new simple SecretCommand in the Commands folder, which just shows a secret message:
using Spectre.Console.Cli;
using Spectre.Console;

namespace Cli.Lessons.Commands
{
    public class SecretCommand : Command
    {
        public override int Execute(CommandContext context)
        {
            AnsiConsole.WriteLine("Shhhhh.....");
            return 0;
        }
    }
}
Then, we need to configure it in our ConsoleApp:
using Cli.Lessons.Commands;
using Spectre.Console.Cli;

namespace Cli.Lessons
{
    class Program
    {
        public static int Main(string[] args)
        {
            var app = new CommandApp<HelloCommand>();
            app.Configure(config =>
            {
                config.ValidateExamples();

                config.AddCommand<HelloCommand>("hello")
                    .WithAlias("hi")
                    .WithDescription("Say hello to anyone.")
                    .WithExample(new[] { "hello", "--name", "DarthPedro" });

                config.AddCommand<ByeCommand>("bye")
                    .WithDescription("Says goodbye.")
                    .WithExample(new[] { "bye" });

                config.AddCommand<SecretCommand>("secret")
                    .WithDescription("Secret command for power users.")
                    .IsHidden();
            });

            return app.Run(args);
        }
    }
}
As we can see, the AddCommand<SecretCommand> configuration is very similar to the other commands we’ve made earlier. The only difference is line #26, where we call the IsHidden method.
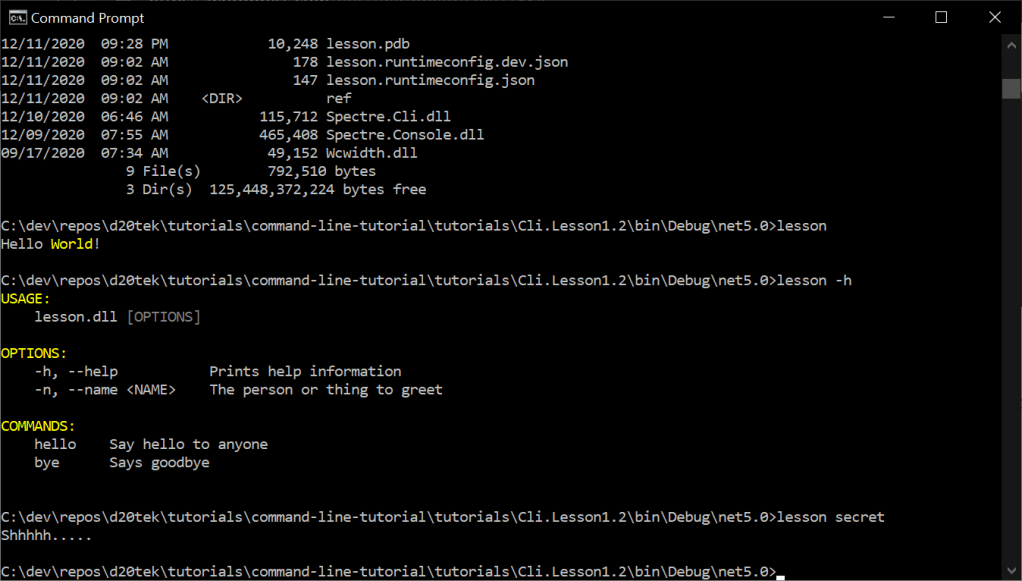
Now if we build and run our command-line app, we will see some new behavior. First, when we get the app help text, we can see that there is no mention of the secret command.

But when we use the command as a command-line argument, that command is processed and its Execute method is called: lesson secret.
In conclusion, we looked at building and configuring multiple commands in our app. Multiple commands with the CommandApp argument processing functionality provides control flow for our app based on command-line arguments, so we can build some complex logic in our CLI apps. Then the default command makes it easy to run a command when no arguments are specified. And command configuration allows us to provide public and hidden commands based on our needs.
Moving forward, we are going to look at nested commands and configuring them using the AddBranch method.
Note: These used to be two separate packages (Spectre.Console and Spectre.Cli), but the have been combined for easier development and support. If you use Spectre.Console prior to version 0.36.0, then this sample code will not work. You can either upgrade the to the latest Spectre.Console package, or include the corresponding Spectre.Cli package.

One thought on “Lesson 1.2: Multiple, Default, and Hidden Commands”