To this point, we have been using synchronous commands, but the Spectre.Console.Cli library also supports asynchronous commands. For anyone familiar with the async/await concepts in .NET, these commands follow the same pattern. When our commands use asynchronous APIs (for file I/O or web service calls), then we also need our commands to be asynchronous. With asynchronous commands the code doesn’t lock, so UI can be updated and parallel code can be run.
In this lesson, we will look at writing and configuring asynchronous commands and how they are processed in our command-line app. We will continue to use the Contoso University commands that we defined in the previous lesson.
Reminder: you can find the source for this lesson in our Azure DevOps repo: Cli.Lesson1.4 – Repos (azure.com).
First, let’s start by creating a new Console App in Visual Studio named Cli.Lesson1.4… review project creation in Lesson 1.1, for the full details on getting setup.
Build Async Commands
We are going to create four separate commands in the the project Commands folder. All of these commands will derive from AsyncCommand rather than Command (which we have used up to now), and override the ExecuteAsync method instead of Execute.
First, create the StudentAddCommand class:
using Spectre.Console.Cli;
using Spectre.Console;
using System;
using System.ComponentModel;
using System.Threading.Tasks;

namespace Cli.Lessons.Commands
{
    public class StudentAddCommand : AsyncCommand<StudentAddCommand.Settings>
    {
        public class Settings : CommandSettings
        {
            [CommandArgument(0, "<ID>")]
            [Description("New student unique id.")]
            public int Id { get; set; }

            [CommandArgument(1, "<FIRST-NAME>")]
            [Description("New student first name.")]
            public string FirstName { get; set; }

            [CommandArgument(2, "<LAST-NAME>")]
            [Description("New student last name.")]
            public string LastName { get; set; }

            [CommandOption("-e|--enrollment <DATE>")]
            [Description("New student enrollment date.")]
            public DateTimeOffset? EnrollmentDate { get; set; }
        }

        public override Task<int> ExecuteAsync(CommandContext context, Settings settings)
        {
            var enrolled = settings.EnrollmentDate ?? DateTimeOffset.Now;
            AnsiConsole.MarkupLine(
                $"[bold]Add Student =>[/] id[[{settings.Id}]], " +
                $"name[[{settings.FirstName} {settings.LastName}]] " +
                $"enrolled[[{enrolled}]]");
            return Task.FromResult(0);
        }
    }
}
We notice that the bulk of this class looks exactly like the synchronous version (in lesson 1.3), with the following changes:
- In line #9, we derive our command from the
AsyncCommandbase class. - In line #30, we override that class’s
ExecuteAyncmethod and return aTask<int>. - In line #37, we return a
Taskwith the appropriate value. We useTask.FromResultbecause this simple example code doesn’t actually call any async APIs.
We will see that all of the async commands below make these same changes…
Then, create the StudentDeleteCommand class:
using Spectre.Console.Cli;
using Spectre.Console;
using System.ComponentModel;
using System.Threading.Tasks;

namespace Cli.Lessons.Commands
{
    public class StudentDeleteCommand : AsyncCommand<StudentDeleteCommand.Settings>
    {
        public class Settings : CommandSettings
        {
            [CommandArgument(0, "<ID>")]
            [Description("Id used to remove student.")]
            public int Id { get; set; }
        }

        public override Task<int> ExecuteAsync(CommandContext context, Settings settings)
        {
            AnsiConsole.MarkupLine($"[bold]Delete Student =>[/] id[[{settings.Id}]]");
            return Task.FromResult(0);
        }
    }
}
Next, create the StudentListCommand class:
using Spectre.Console.Cli;
using Spectre.Console;
using System.Threading.Tasks;

namespace Cli.Lessons.Commands
{
    public class StudentListCommand : AsyncCommand
    {
        public override Task<int> ExecuteAsync(CommandContext context)
        {
            AnsiConsole.MarkupLine($"[bold]List All Students[/]");
            return Task.FromResult(0);
        }
    }
}
Finally, create the StudentViewCommand class:
using Spectre.Console.Cli;
using Spectre.Console;
using System.ComponentModel;
using System.Threading.Tasks;

namespace Cli.Lessons.Commands
{
    public class StudentViewCommand : AsyncCommand<StudentViewCommand.Settings>
    {
        public class Settings : CommandSettings
        {
            [CommandArgument(0, "<ID>")]
            [Description("Id used to find student.")]
            public int Id { get; set; }
        }

        public override Task<int> ExecuteAsync(CommandContext context, Settings settings)
        {
            AnsiConsole.MarkupLine($"[bold]View Student =>[/] id[[{settings.Id}]]");
            return Task.FromResult(0);
        }
    }
}
These asynchronous commands are defined. Now, let’s see how we can configure them.
Configure the Commands
Async command configuration is exactly the same as that for synchronous commands. All of the same configuration methods, root commands, branches, etc. So there are only minor changes required to our Program.cs file to run those commands asynchronously. Update that file with the latest code:
using Cli.Lessons.Commands;
using Spectre.Console.Cli;
using System.Threading.Tasks;

namespace Cli.Lessons
{
    class Program
    {
        public static async Task<int> Main(string[] args)
        {
            var app = new CommandApp();
            app.Configure(config =>
            {
                config.CaseSensitivity(CaseSensitivity.None);
                config.SetApplicationName("lesson");
                config.ValidateExamples();

                config.AddBranch("student", student =>
                {
                    student.SetDescription("View, list, add or remove students.");

                    student.AddCommand<StudentAddCommand>("new")
                        .WithAlias("add")
                        .WithDescription("Add new student information.")
                        .WithExample(new[] { "student", "new", "1001", "Bill", "Shakespeare", "--enrollment", "5/14/1549" });

                    student.AddCommand<StudentViewCommand>("view")
                        .WithDescription("View student information by id.")
                        .WithExample(new[] { "student", "view", "1001" });

                    student.AddCommand<StudentListCommand>("list")
                        .WithDescription("View list of students.")
                        .WithExample(new[] { "student", "list" });

                    student.AddCommand<StudentDeleteCommand>("delete")
                        .WithAlias("del")
                        .WithDescription("Remove student from list.")
                        .WithExample(new[] { "student", "delete", "1001" });
                });
            });

            return await app.RunAsync(args).ConfigureAwait(false);
        }
    }
}
In line #9, we update the Main method signature to add the async keyword and return Task<int>, which also makes it an asynchronous method.
And line #42, we use the await keyword and run the CommandApp.RunAsync method. This runs the Spectre.Console.Cli.CommandApp and all of our commands asynchronously. That’s all it takes to make our console app run asynchronously.
Build and Test Async Commands
With all of the code in place, we can now build and run our asynchronous command line app. Let’s run some commands and see what they display. In these simple commands, there isn’t much visible difference because there isn’t any long running code…
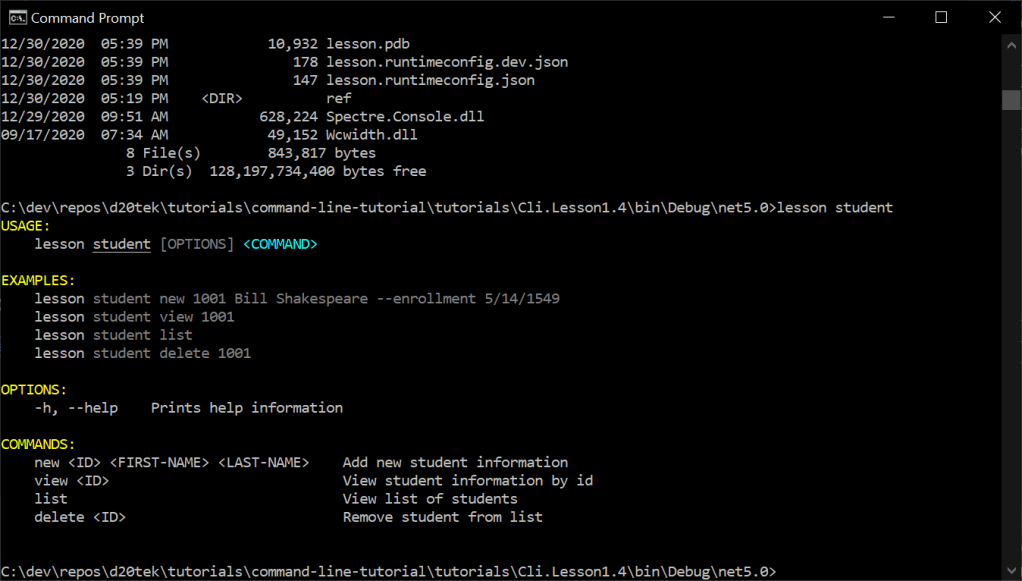
1. Just the root command (to show the help text) – lesson student:
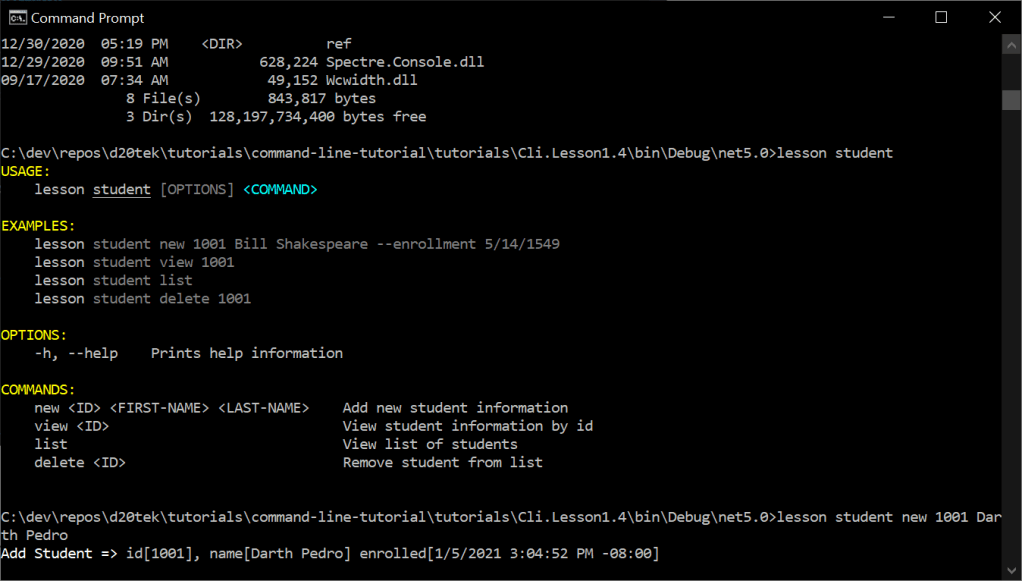
2. Let’s add a student – lesson student new 1001 Darth Pedro:
3. Let’s try the other commands – lesson student delete 1001, lesson student view 1001, and lesson student list:

As we can see this behavior looks exactly like we built in lesson 1.3 as well.
In conclusion, we were able to change our commands to be asynchronous by deriving from AsyncCommand. We changed our Main function to also be asynchronous. The rest of the configuration code remained the same. Now we can use either sync or async commands depending on our requirements.
