Early in our development of the SimpleRPG game project, we set up a continuous integration pipeline to automate our build with every repo check-in. Now we are going to set up another pipeline for our game services. Since the services are in their own repository and solution and have different deployment requirements, we will need to define a new pipeline.
We will again use Azure Pipelines to automate our build in our Azure DevOps project. The build needs to perform multiple steps:
- Install .NET Core – ensure the correct version of .NET core is installed on the build agent.
- Restore NuGet Packages – get the referenced NuGet packages onto the build agent.
- Build Projects – build all of the projects in the repository.
- Run Tests – run all test projects and report the results.
- Publish Artifacts – to prepare source projects for deployment.
Create Azure-Pipelines.yml
Let’s create the azure-pipelines.yml file in the root build folder. This file is responsible for all of the build tasks and their configuration.
# Starter pipeline
# Start with a minimal pipeline that you can customize to build and deploy your code.
# Add steps that build, run tests, deploy, and more:
# https://aka.ms/yaml

trigger:
- '*'

# all of the variables used by this pipeline and dependent templates.
variables:
  buildConfiguration: 'Release'
  dotnetSdkVersion: '3.1.200'
  releaseBranchName: 'main'
  localPackageFeed: 'd20Tek'

# define the image to use for the whole pipeline... can be overridden by specific jobs.
pool:
    vmImage: 'ubuntu-16.04'

stages:
# Build
- stage: 'Build'
  displayName: 'Build app'
  jobs:
  - job: 'Build'
    displayName: 'Build job'

    steps:
    # ensure the right version of .NET Core is installed -- defaults to 3.1.
    - task: UseDotNet@2
      displayName: 'Use .NET Core SDK $(dotnetSdkVersion)'
      inputs:
        version: '$(dotnetSdkVersion)'

    # restore NuGet packages used by the projects.
    - task: DotNetCoreCLI@2
      displayName: 'Restore project dependencies'
      inputs:
        command: 'restore'
        projects: '**/*.csproj'
        feedsToUse: 'select'
        vstsFeed: '$(localPackageFeed)'

    # build all projects in this repo... defined by folders with .csproj files.
    - task: DotNetCoreCLI@2
      displayName: 'Build the project - $(buildConfiguration)'
      inputs:
        command: 'build'
        arguments: '--no-restore --configuration $(buildConfiguration)'
        projects: '**/*.csproj'
        versioningScheme: byBuildNumber

    # publish all artifacts from the builds.
    - task: DotNetCoreCLI@2
      displayName: 'Publish the project - $(buildConfiguration)'
      inputs:
        command: 'publish'
        projects: '**/*.csproj'
        publishWebProjects: false
        arguments: '--no-build --configuration $(buildConfiguration) --output $(Build.ArtifactStagingDirectory)/$(buildConfiguration)'
        zipAfterPublish: true

    # runs tests for all projects in this repo... defined by folders with .Test.csproj files.
    - task: DotNetCoreCLI@2
      displayName: 'Run unit tests - $(buildConfiguration)'
      inputs:
        command: 'test'
        arguments: '--no-build --no-restore --configuration $(buildConfiguration)'
        # publish the test pass/fail results to the pipeline, so that they are available in the Azure DevOps pipeline dashboard.
        publishTestResults: true
        projects: '**/*.Tests.csproj'

    # publish the artifacts created by this build in the drop location.
    - task: PublishBuildArtifacts@1
      displayName: 'Publish Artifact: drop'
      condition: succeeded()
As we can see from the comment blocks, this build script is divided into 5 specific tasks or steps:
- The header of this file defines the trigger for this build (all commits on all branches), and parameters for the build target, SDK version, the release branch, and the build machine image.
- Step 1: ensures that the specified .NET Core SDK is installed.
- Step 2: restores all NuGet packages are on the build machine with the correct versions.,
- Step 3: builds all of the projects in this repo, publishes the build artifacts, and ensures that the are zipped up.
- Step 4: runs all of the test projects in the repo (all project files that end in .Tests.csproj). Also the
publishTestResultsparameter ensures that the test results are published to the DevOps build page, so we can see the results within the build UI. - Step 5: copies all build outputs to a drop location, so that they are available for our deployment pipeline (coming next lesson).
This is all we need to complete an automated build for our services. If you need more detailed descriptions of each build step, please review Lesson 1.9.
Configuring Pipeline in Azure DevOps
Let’s check in our build script into the ‘chapter-5’ feature branch, and sync it to our repo. This gets the script into our shared repository. Now, we can configure an Azure Pipeline to use this script for our automated build.
- Go to the Azure DevOps website, and click the Pipelines tab in the left side navigation panel.
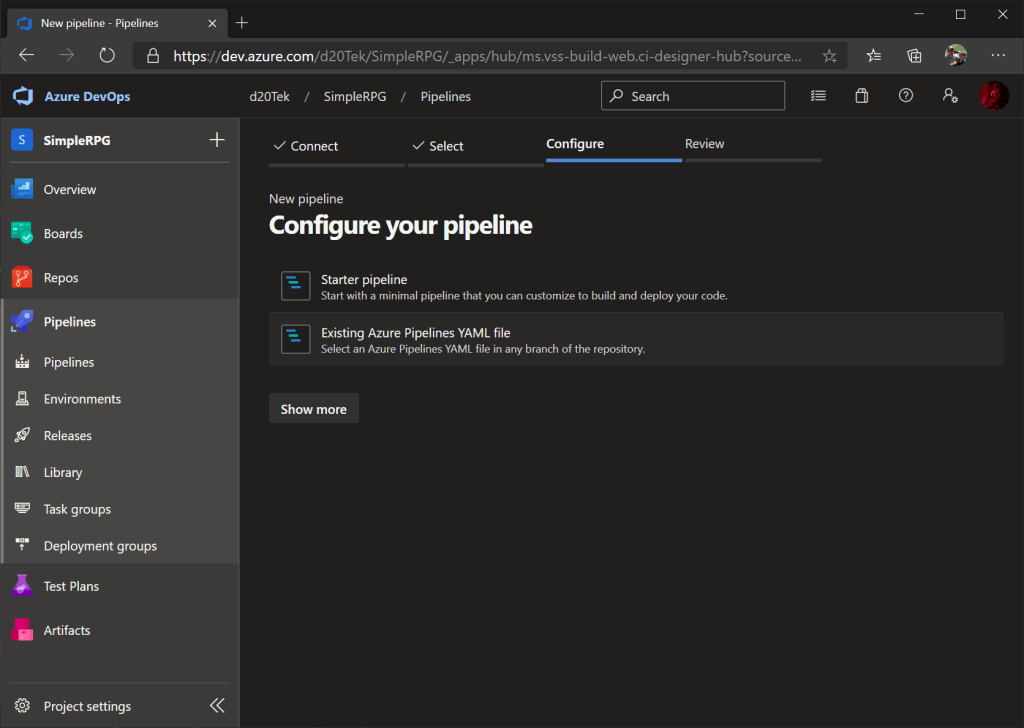
- Then, click the New Pipeline button on the top right of the page.
- Select our repo from the Azure Repos list — simple-rpg-services.

- Configure the pipeline by selecting – Existing Azure Pipeline YAML file.
- In the dialog, select our current feature branch – features/chapter-5.
- In the path, enter /build/azure-pipelines.yml (this is the file we created earlier).
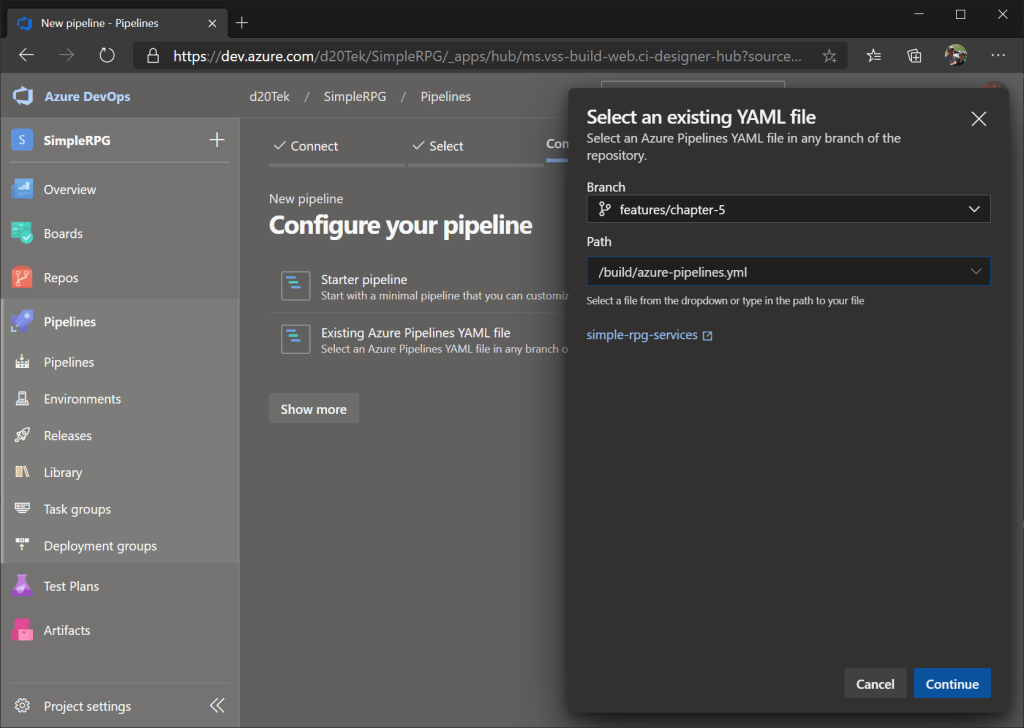
- This will load the file into the pipeline editor for review, but we do not need to change anything.
- So, click the Run button to launch a build — make sure to run the build in the feature branch (since our code hasn’t made it to the main branch just yet).

Once the build completes, let’s take a look at the test results page by selecting the ‘Tests’ tab. We should have 141 passing tests.

Configure Pull Request Build Validation
With our feature branch building, we need to also build whenever there is a pull request to the main branch. To enable this in Azure DevOps, we must set up build validation policies on the main branch:
- Go to the ‘Repo’ tab in the navigation panel and select the branch item.
- Select the ‘main’ branch and click the ellipsis.

- In the context menu, select the ‘Branch policies’ menu item.
- Scroll to the ‘Build Validation’ section.

- Click the ‘Add’ button.
- In the ‘Add build policy’ flyout, select the ‘simple-rpg-services-ci’ pipeline (that we just built), ensure the automatic trigger is set, and it is required to pass to complete pull requests. Then, save the new policy.

With this configuration in place, any pull request into our main branch will need to pass a successful build first.
Finally, we will submit a pull request to get the current ‘chapter-5’ feature branch into our main branch. We will need the code in the main branch to create our continuous delivery pipeline next lesson. To follow the steps to perform a pull request, please follow the steps in this lesson. (If you are familiar with the process, just do it). After the pull request is complete, we should see the following screen:

And when we complete the pull request, we will get another build in the main branch.
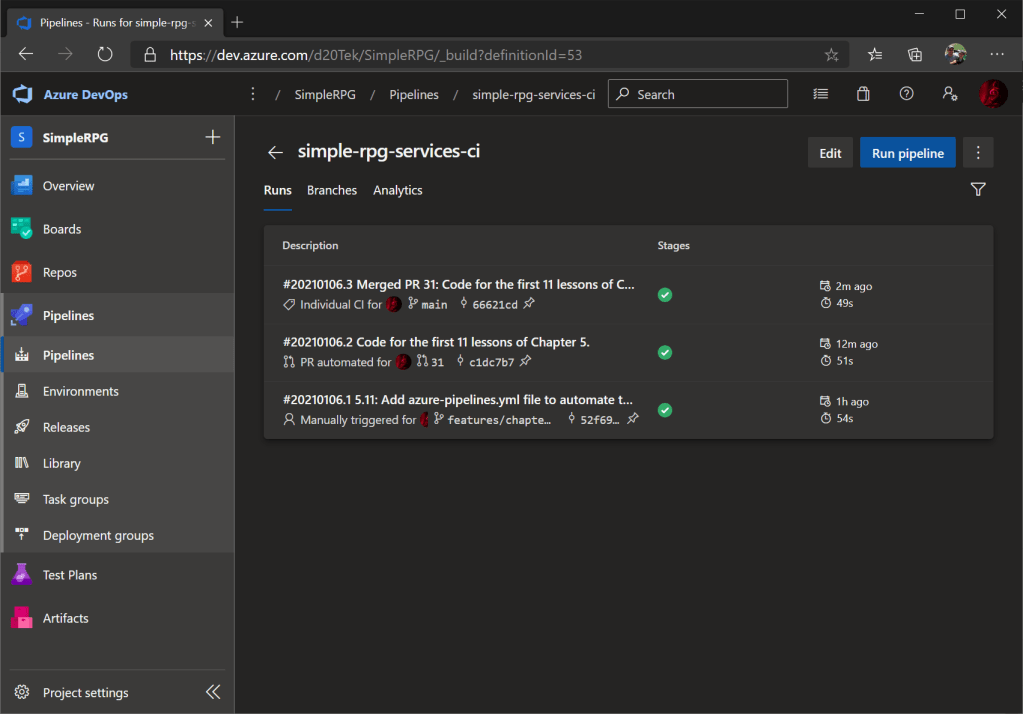
As we can see, there are three builds: for the feature branch, validation build with the pull request, and the main branch build after the pull request committed.
In conclusion, we have a continuous integration script that builds, tests, and publishes our Azure Functions web service in any branch. The quality of our build will be verified with every push to feature branches and pull requests to the main branch. That’s what continuous integration is all about!

One thought on “Lesson 5.11: Create CI Pipeline for Azure Functions Project”