Our game is now dependent on our Azure Function web services. All of the local game data has been deleted, so the game no longer runs standalone, and it will not launch if it doesn’t have an internet connection during startup. However, since we load and cache the game data from the web services at startup, the game can run from that point forward.
Since this is a major upgrade to our application architecture, we are going to deploy this version independently from our v1. That way we can keep our stand-alone, local data game running at its current url: https://bit.ly/simple-rpg-v1. And, we are going to deploy a v2 of our game.
To create a new deployment version, we are going to follow some of the steps that we did earlier in chapter 5 to create an Azure Storage account for the static website, create a pull-request to bring our latest game code into the main branch, update the ‘simple-rpg-game-cd’ release pipeline to target the new storage account, and run a new release.
Azure Storage Account
First, we need a new Azure Storage account for this new version. We created a new storage account during Lesson 5.12 called ‘simple-rpg-v2’ to hold our Azure Function configuration and data. We are going to use that storage account to hold our Blazor game app too. We could create separate accounts for the website and Function App configuration, but for this sample we will do the simplest setup.
- In the Azure Portal, navigate to the ‘simple-rpg-v2’ storage account.
- Select the ‘Static website’ item in the navigation panel (you may need to scroll).
- In the main window, enable the ‘Static website’ toggle button.
- Set the ‘Index document’ edit box to index.html (this is the main page in our Blazor game).
- Click the ‘Save’ button.
- This will create the ‘$web’ container to hold our website and produce the public URLs for the site: https://simplerpgv2.z5.web.core.windows.net/.
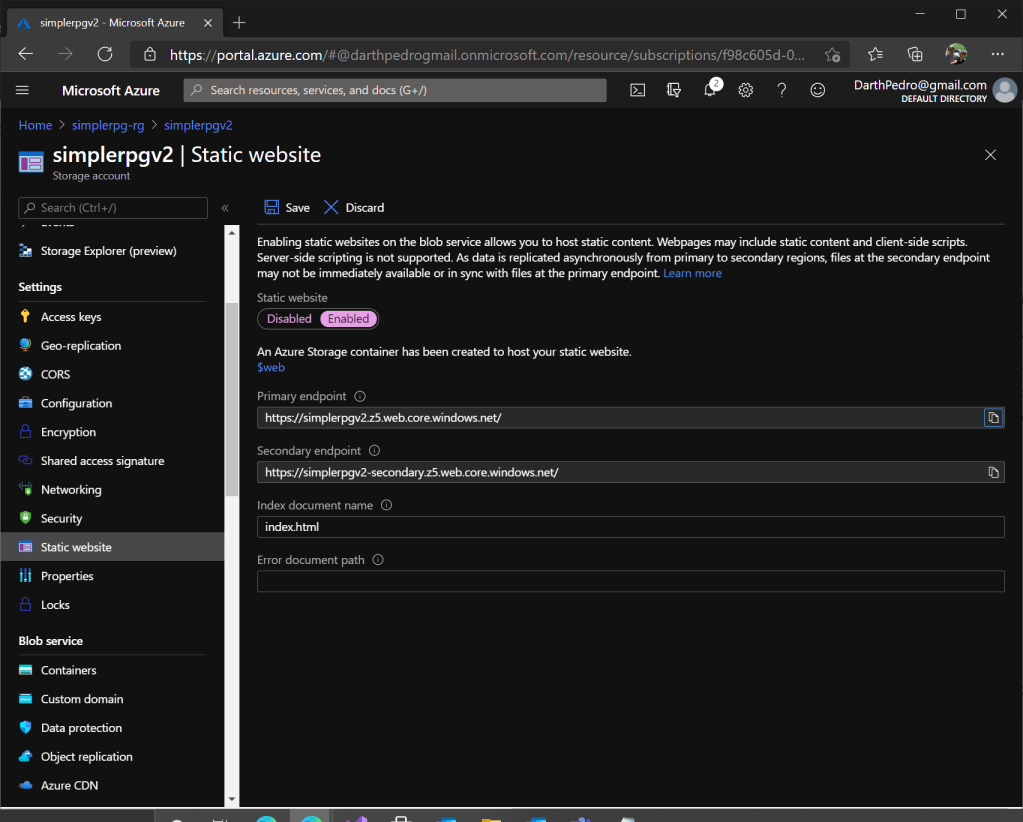
These steps should be vaguely familiar because we followed the same steps in setting up ‘simple-rpg-v1’ storage account in Lesson 5.2.
Pull Request Code to Main
We have completed our SimpleRPG.Game code for this chapter, so it’s time to create a pull request and commit our changes to the main branch. To do this, follow the detailed steps in Lesson 1.11.
Update Release Pipeline
With our code committed to the main branch and the automated build completed, we have a build of our latest code that we can release.
Our first step is to update the ‘simple-rpg-game-cd’ release pipeline to target the new storage account. Note: we don’t want to overwrite our v1 of the game, so be sure to do this before creating another release.
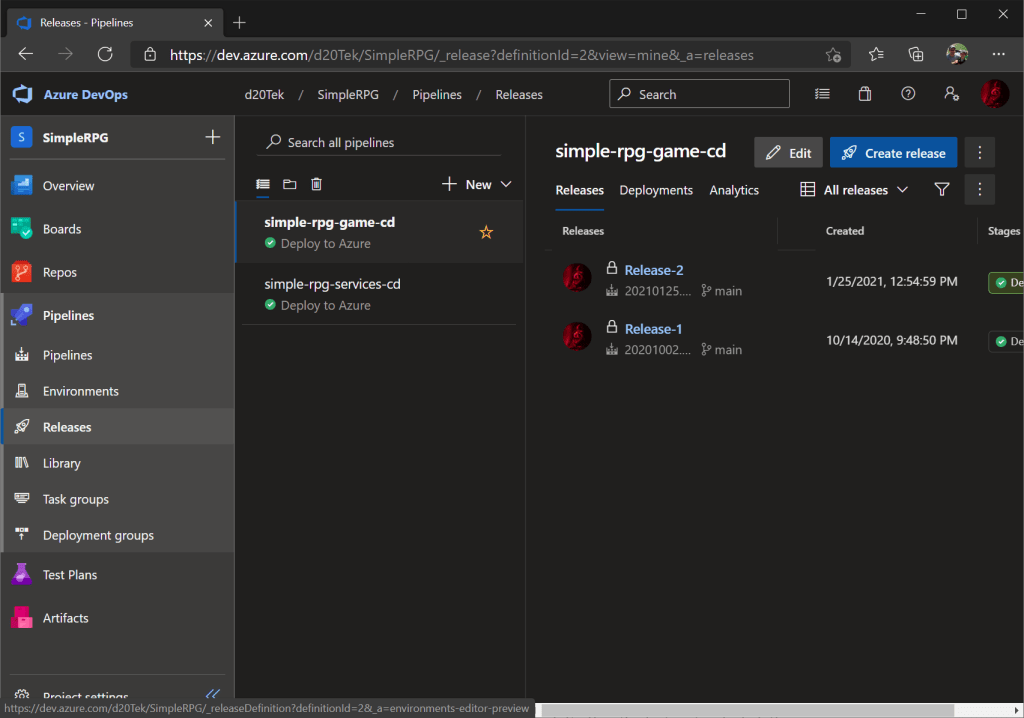
- In our Azure DevOps project, let’s select ‘Pipelines’ in the navigation panel.
- Then select the ‘Releases’ item.
- We have two release pipelines (for the game website and the services).
- Select ‘simple-rpg-game-cd’ pipeline, then click the ‘Edit’ button. (The other one listed is for our Function services release.)
- It launches the editor for this pipeline, so now switch to the ‘Tasks’ tab.
- Select the ‘Blazor App Copy’ task in the ‘Agent job’ node (it’s the only one in that list).
- In the task configuration, update the ‘RM Storage Account’ selection to ‘simplerpgv2’.
- Save the changes to this pipeline.
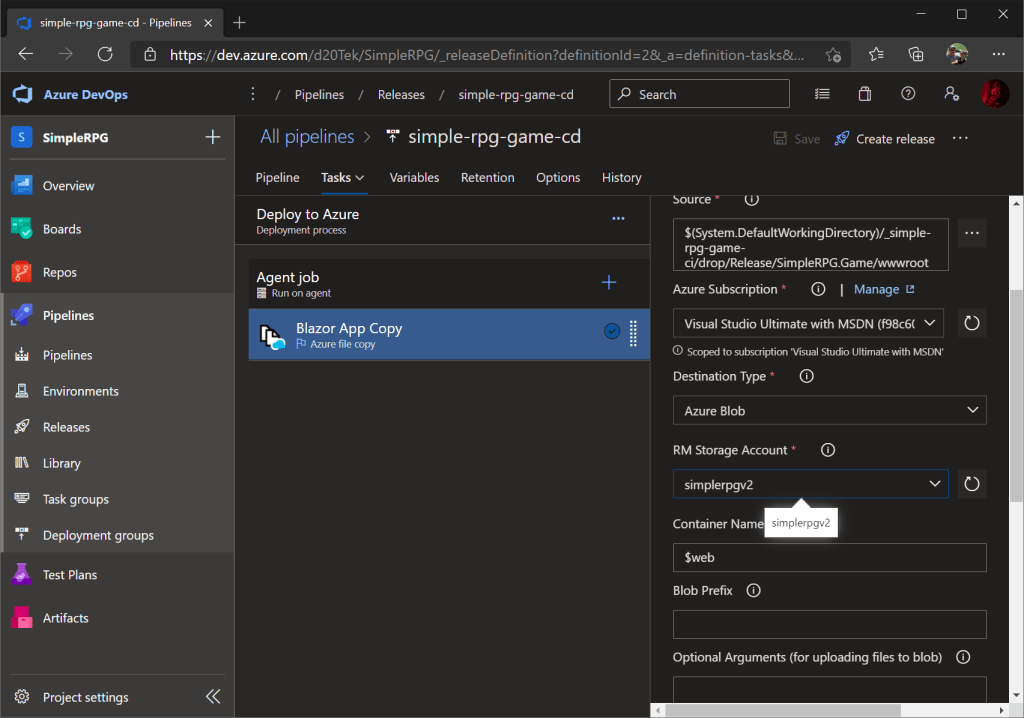
- Finally return to the pipeline window.
That’s the only change we need to target the new Azure storage account.
Run New Release
With the pipeline changes completed, we can run a new release.
- In the ‘simple-rpg-game-cd’ release pipeline screen (where we left off in the last section), click the ‘Create release’ button.
- This will launch the ‘New release’ flyout.
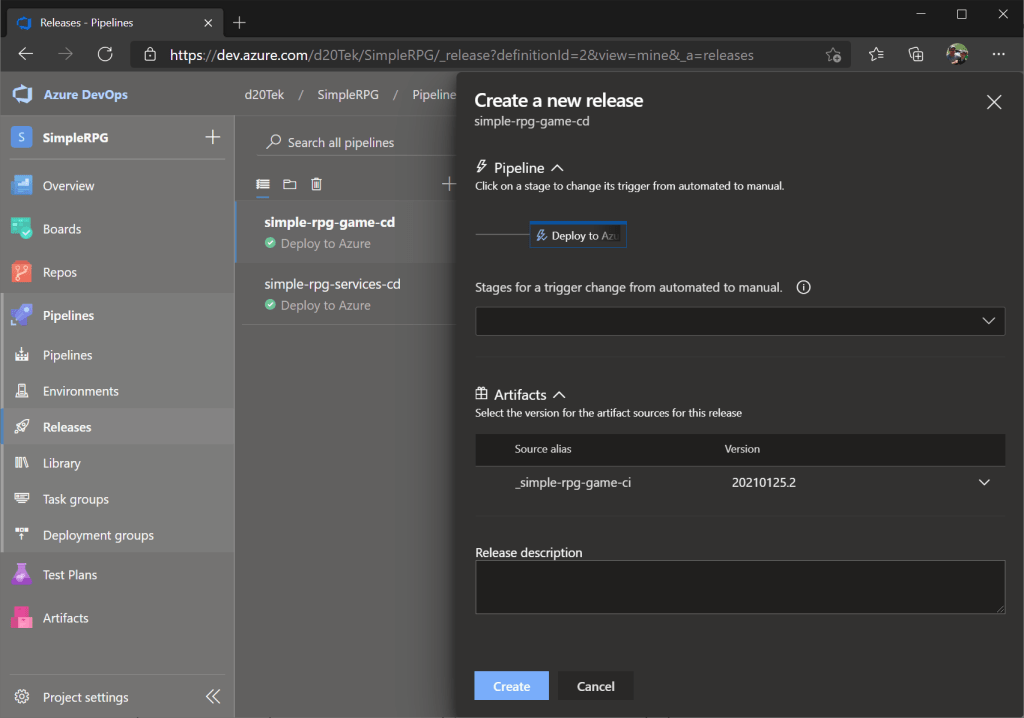
- In this flyout, we just need to click the ‘Create’ button… go with the defaults for the elements in the flyout.
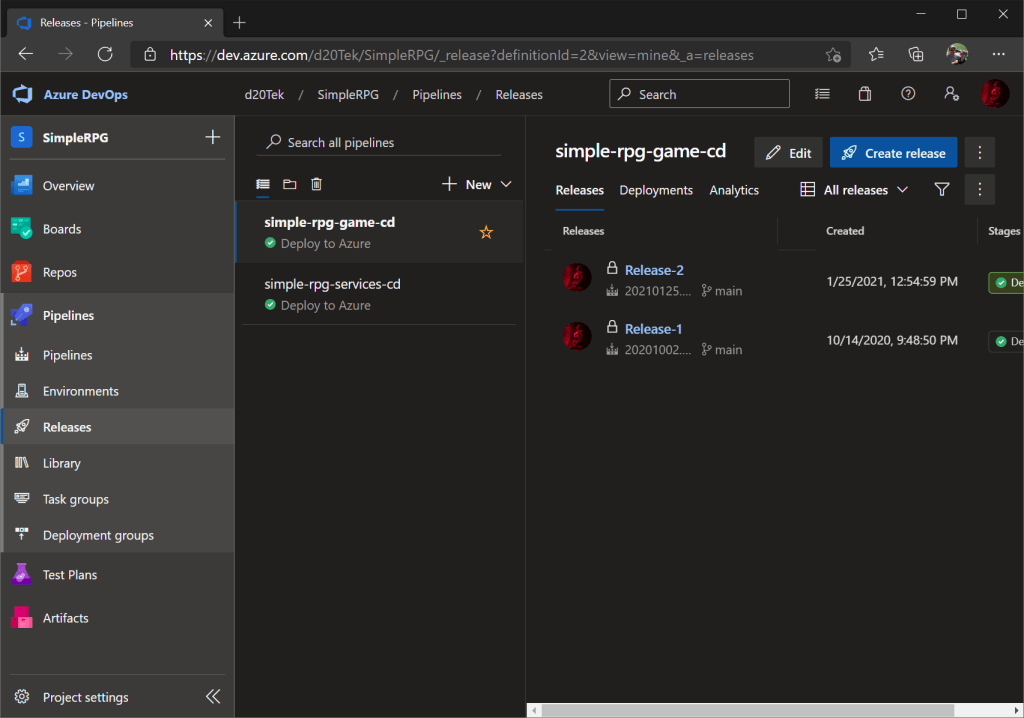
- We are returned to the pipeline screen and see a new release: Release 3 for example.

- If we select the running release, we can watch while it progresses through the steps.
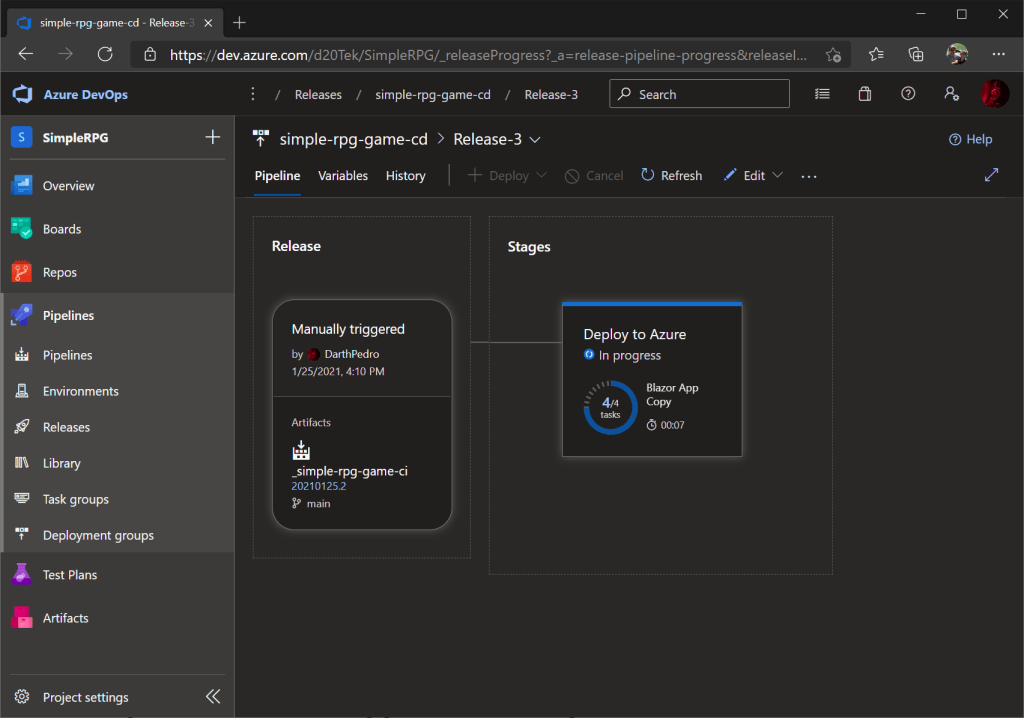
Upon successful completion of the release script, our new build has been deployed to Azure.
Update Functions App CORS Configuration
Before we can try out our new public website, we must remember our friend the CORS configuration (that we learned about in Lesson 5.14). That configuration must be updated to allow our new website to communicate with our game services. If we try to run the new website now, we will get an exception during page load saying that we cannot access a URL resource (as we did when we tried it from our localhost).
- Let’s go back to the Azure Portal and navigate to the ‘simple-rpg-services’ resource.
- In this Function App resource, select the ‘CORS’ item in the navigation panel (again scrolling will be necessary).
- In the CORS screen, we need to add a couple of additional URLs to the ‘Allowed origins’ list.
- Add ‘https://simplerpgv2.z5.web.core.windows.net’ (note no trailing backslash).
- Add ‘https://simplerpgv2-secondary.z5.web.core.windows.net’
- Then click the ‘Save’ button.
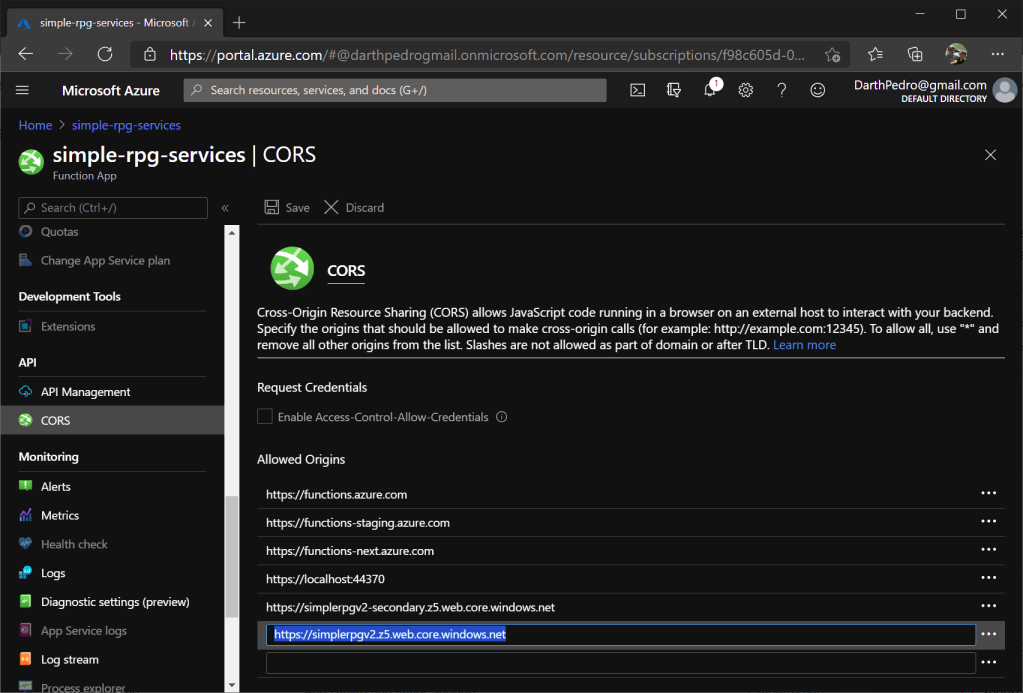
These are the two URLs for our static website. There are two because the website is set up to support failover to a secondary location. This configuration allows our public game website to communicate with our game services.
We have performed many of the steps in this lesson individually before, but we wanted to bring it all together to get our app fully deployed – both the game website and the game services. We can now run the new website at: https://bit.ly/simple-rpg-v2 (which maps to our v2 URL: https://simplerpgv2.z5.web.core.windows.net).
The app should launch to the familiar game screen with the new title: Simple RPG Online (this is the simplest way to determine we are at the correct location). It has all of the functionality that we built in this chapter and communicates with web services to retrieve all of the game data.
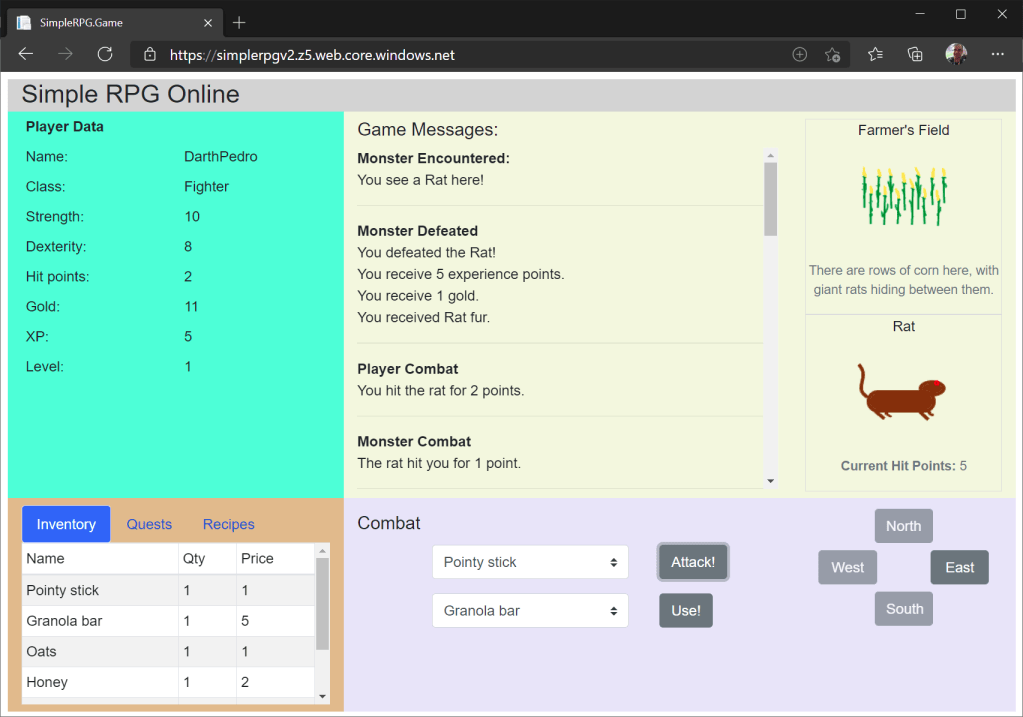
Feel free to explore around the game, collect items, and kill some monsters.

2 thoughts on “Lesson 5.16: Redeploy SimpleRPG Game to New Storage Account”