Since our game is already a Blazor WebAssembly, we will easily be able to deploy it to multiple cloud hosting platforms. Any service that provides for a static website will also be able to host our game. In this series, we’re going to be working with Azure for our web service development, so it makes sense to also deploy our game client to Azure as well.
There are multiple options for computing power in Azure:
- IaaS: virtual machines (Windows and Linux), VM scale sets.
- PaaS: Azure App service, Web Apps, Cloud Services.
- Containers: Azure Kubernetes Service (AKS), Container Instances, Service Fabric.
- Serverless: Static website, Azure Functions, EventGrid, Logic Apps.
There’s really too many options to pick from some times. But for our app, since it runs all of its logic client-side, we don’t need any computing power in the cloud for the client. What we really need is a url that players can navigate to, the ability to download our app files to their client devices, and then run the single page application from there. Using the Azure Storage resource configured to serve up static web pages will do exactly what we want for our game.
This also has the benefit of being the cheapest option in hosting our web application in Azure. The game runs on pennies per day. With low traffic sites, like our tutorial, it could be under $1 per month. The payment is based on the amount of data stored and retrieved, and the number of download requests, so it will grow with the popularity of our game or app.
Setup Azure Storage Account
As we’ve stated earlier in the lessons, we need to have an Azure account for the lessons in this chapter.
1. Let’s start by logging into our Azure account by navigating to https://portal.azure.com.
2. Click the ‘Create a Resource’ button at the top left, and search for ‘Storage Account’.

3. Click the ‘Create’ button.

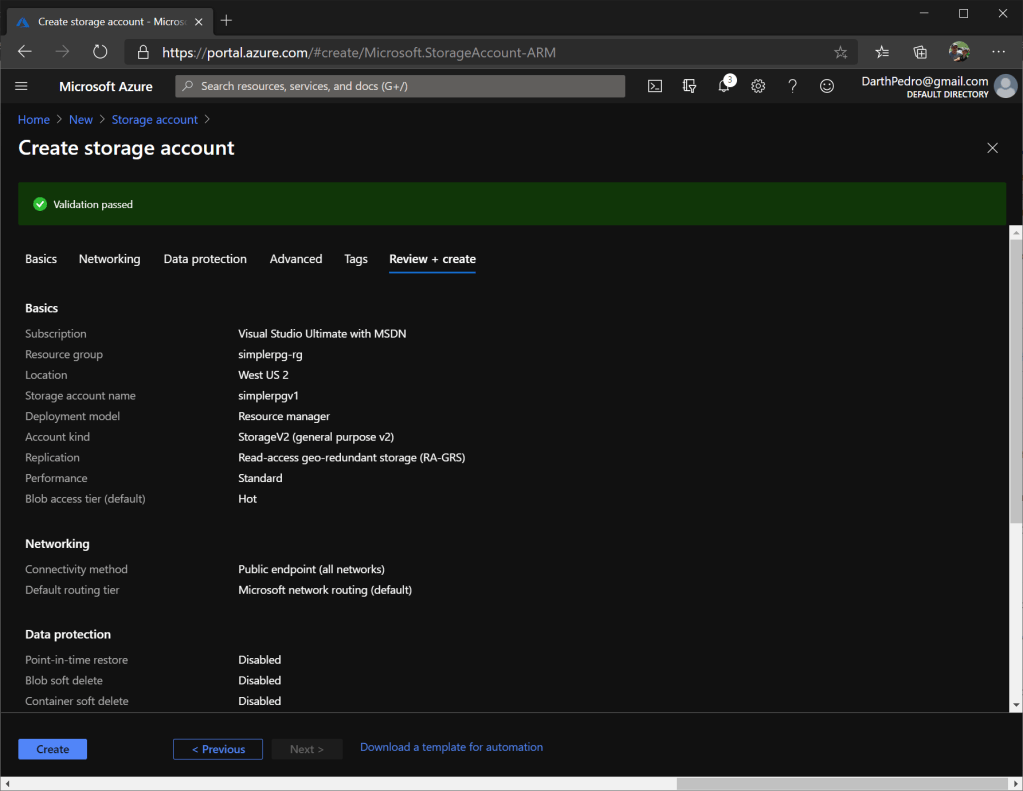
4. To setup a new storage account, we need to provide the following data:
- Subscription: this should be automatically filled in by the account we are logged into. If there are multiple subscriptions, we can select the one we want here.
- Resource group: Click the ‘Create New’ link to create a new resource group for these lessons named: ‘simplerpg-rg’. Resource groups are a way of organizing your resources in Azure, so we know that they all belong to the same logical app/service. We can view all of the resources in a group, and we can see the costs by group as well.
- Storage account name: this must be a unique name because it becomes part of our url to the storage collections. For this lesson, we are using ‘simplerpgv1’, but you will need to use a different name, since I’ve taken this one.
- Location: this is the data center where we wish to create this storage account. We’re going with West US 2, but can pick any location.
- Account kind: just go with the default of Standard.
- Replication: we are testing out geo-redundant storage so that our data will be backed up.
5. Once this is all filled out, press the ‘Review + create’ button because we will accept all of the defaults for the remaining configuration.
6. We get one last chance to review all of our changes. Then press the ‘Create’ button.
7. We will see a ‘Deployment in Progress’ page which will run for a couple of minutes. And then get a ‘Deployment Complete’ page.

After running through these steps, we now have a storage account to hold our Blazor WebAssembly game.
Configure for Static Website
With the setup complete, click the ‘Go to Resource’ button, which will bring up the overview page for the new storage account.
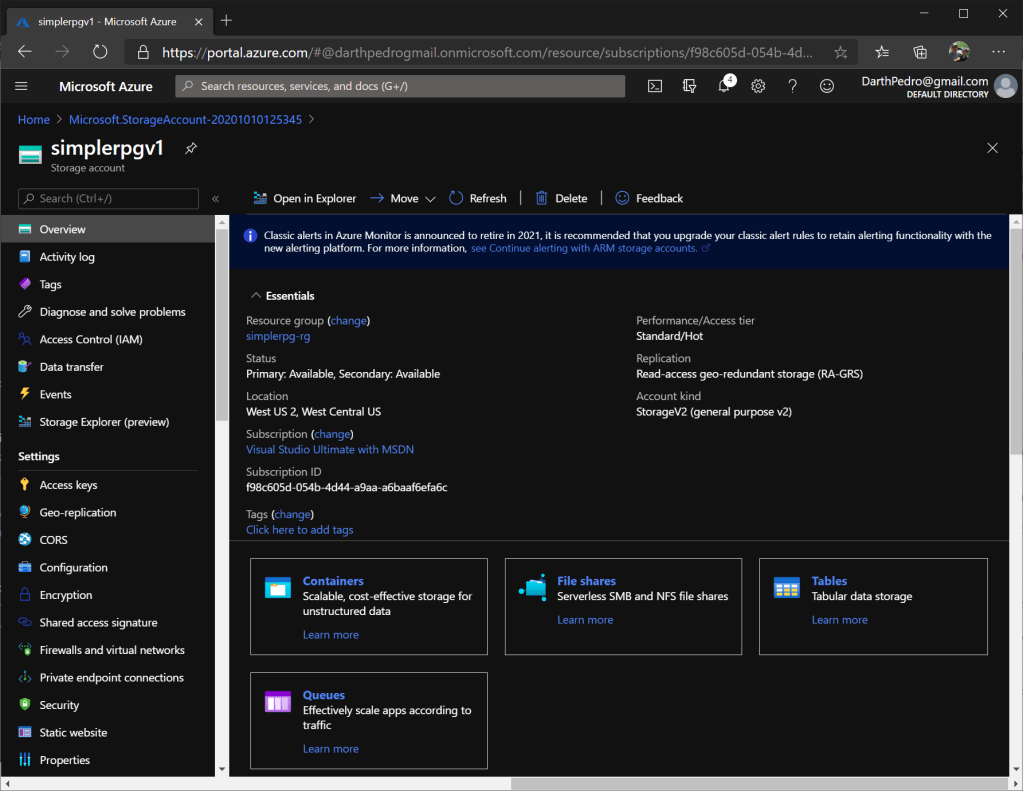
There is so much to see on this page and so many storage options. We are not going to cover them all at this point. But feel free to explore all of the different storage capabilities: blob storage, tables, queues, etc.
For now, we are going to configure this storage account to host a static website:
1. In the left navigation list, click the ‘Static website’ link.
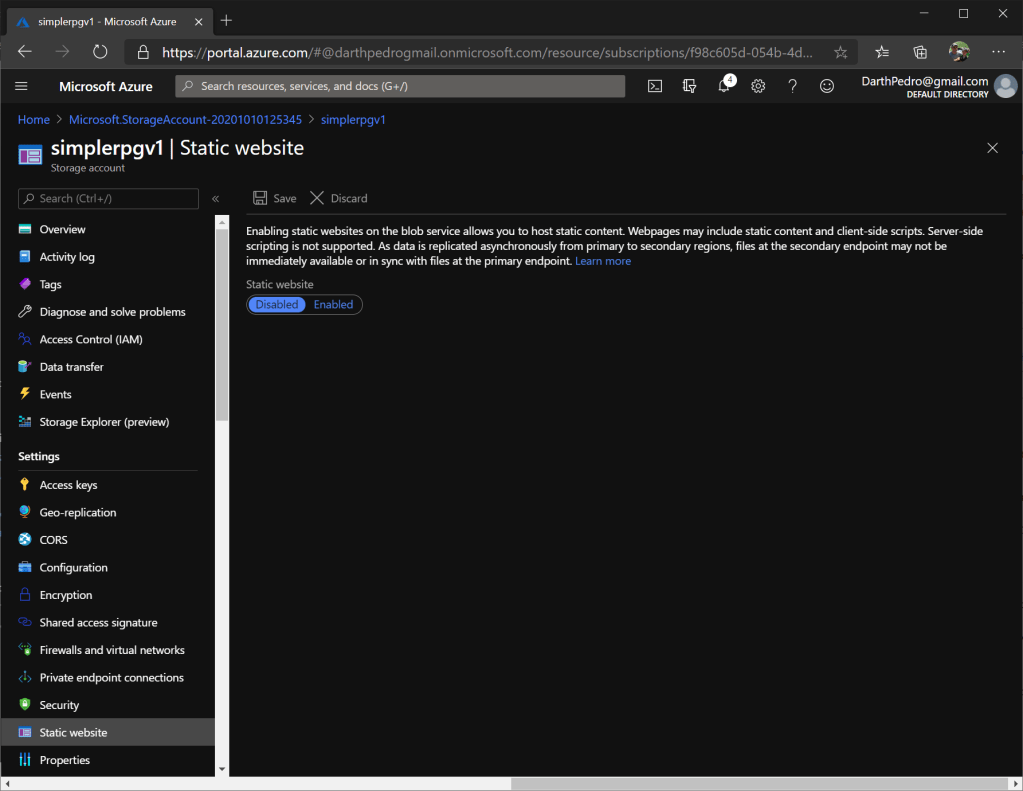
2. Enable the storage account to support a static website.

3. With the feature enabled, set the Index document name to ‘index.html’… remember this is the name of our startup page in the SimpleRPG.Game project. Note: This is the default for Blazor projects, so it should work for any project you try… unless you’ve specifically renamed the index.html page.
4. Finally, click the ‘Save’ button for these changes to take effect.

5. With the operation complete, we will see that Azure created a few things for us:
- Primary endpoint: this is a public url to our static website.
- Secondary endpoint: since we set up geo-replication, we also have a secondary url. Both are active and useable.
- Blob container: ‘$web’ container which will host our static website.
6. Click on the ‘$web’ container link to see the contents of this container in Azure Storage.

An Azure Storage container organizes a set of blobs, similar to a directory in a file system. A storage account can include an unlimited number of containers, and a container can store an unlimited number of blobs. So our entire website will be a set of blobs in this $web container.
When we deploy on our game, all of the content files and folders will appear here.
Testing Configuration
If we try to navigate to the website link now (https://simplerpgv1.z5.web.core.windows.net/ – replace link with your storage link), we will get a 404 content not found error page. Which makes sense since the $web container is currently empty.
To verify that our Azure Storage configuration is correct, let’s create a simple index.html page (anywhere on your machine). This file shows a simple “Coming Soon” message.
<!DOCTYPE html>
<html>
<style>
    body, html {
        height: 100%;
        margin: 0;
        background-color: black;
    }

    .bgimg {
        background-image: url('/w3images/forestbridge.jpg');
        height: 100%;
        background-position: center;
        background-size: cover;
        position: relative;
        color: white;
        font-family: "Courier New", Courier, monospace;
        font-size: 25px;
    }

    .topleft {
        position: absolute;
        top: 0;
        left: 16px;
    }

    .bottomleft {
        position: absolute;
        bottom: 0;
        left: 16px;
    }

    .middle {
        position: absolute;
        top: 50%;
        left: 50%;
        transform: translate(-50%, -50%);
        text-align: center;
    }

    hr {
        margin: auto;
        width: 40%;
    }
</style>
<body>

    <div class="bgimg">
        <div class="topleft">
            <p>Logo</p>
        </div>
        <div class="middle">
            <h1>COMING SOON</h1>
            <hr>
        </div>
        <div class="bottomleft">
            <p>SimpleRPG Game under development, but expect to see it soon.</p>
        </div>
    </div>

</body>
</html>
Then, in the $web container page (that we loaded in the previous section of this lesson), we will upload this index.html file. Start by clicking the ‘Upload’ button in the top left of the page.
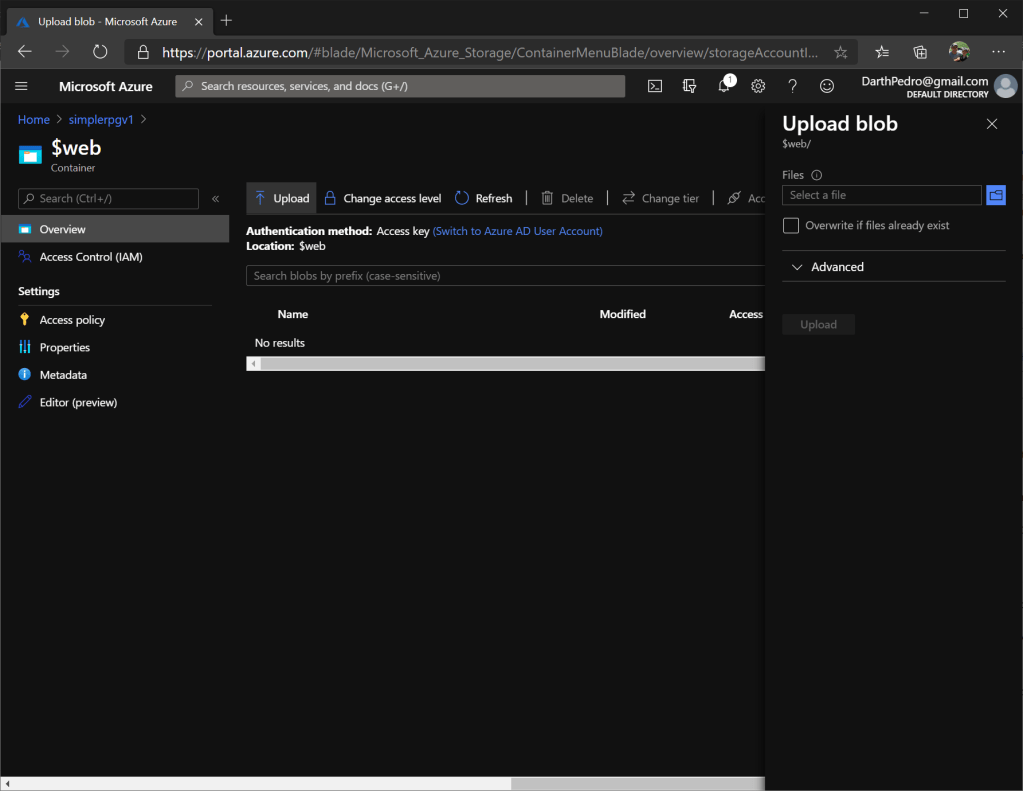
Next in the Upload blob flyout, click the folder icon to bring up the file picker dialog. Navigate to where you saved the index.html file.
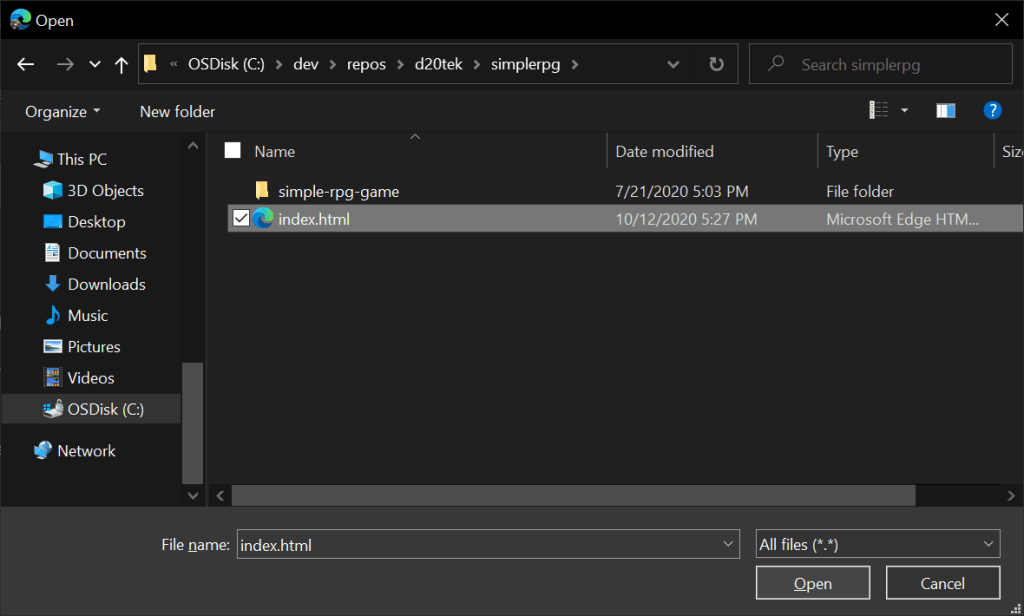
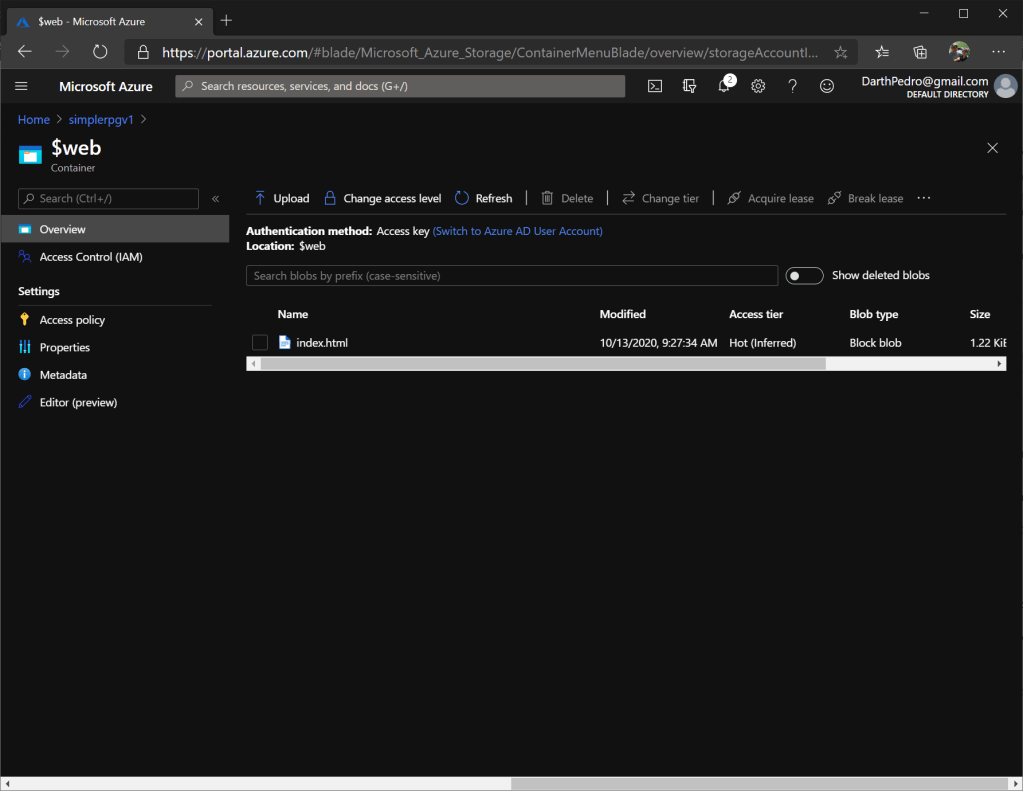
Click the ‘Open’ button here and the ‘Upload’ button in the flyout to begin uploading the file. When it’s complete, the $web container should contain our index.html file in it.
Finally, let’s navigate to the url again: https://simplerpgv1.z5.web.core.windows.net/. At this point we should see the “Coming Soon” message that we put into our test index.html file.

This shows that we can put HTML content into this Azure container and use a browser to navigate to that static content. We could create complex websites in this manner with as many html, css, images, javascript files as we wish. But for our lessons, we will use it to host our Blazor game.
When we build our continuous delivery pipeline, this index.html file will be overwritten by the one in our project.
Setup Friendly Short Name
Currently, we have the default url created for our service public endpoint. It works to get users to our website, but it’s a long, cumbersome name. If we were building a production service/game, we would want to use a custom domain name and map it to our Azure hosted website. The Azure Storage account does have custom domain functionality, so if you’d like to add that, review that feature of storage accounts.
For our lessons, we are just going to keep the default url, but we are going to use a url-shortener, bit.ly, to create a simpler, identifiable link. We used bit.ly to create the following link: http://bit.ly/simple-rpg-v1, which navigates to the same website.
With this lesson complete, we now have a location to host our Blazor game website. We learned about some features of Azure and about the different compute options. And we created a storage account that maps to our public website. In the next lesson, we will look at how to get our game deployed to this Azure storage container.

Gonna start doing this! Been programming on and off for a long time but I’m very out of date right now. Beginner concepts are familiar to me, but some of these intermediate concepts are still foreign. I’m excited to try to make a Blazor RPG though!
Two questions:
1) Right now I’m developing on a Solus Linux install, can I use VSCode instead of VStudio? Will the Visual Studio .ignore work correctly like this?
2) Are there any other resources you’d reccomend for me? I’d like to learn full stack Blazor/C# web development. I know some C# but still learning.
LikeLike
Hi, welcome to this tutorial series. I hope you enjoy building your own game.
1. Yes, you can do all of the actions in VSCode that I have been doing in Visual Studio (I haven’t been using any advanced IDE features). But the path and screens may be different in VSCode, so you will have to explore it.
2. There is lots of great content on Blazor fullstack development on: https://github.com/AdrienTorris/awesome-blazor
LikeLike