
Now that we have our game building automatically in Azure Pipelines and an Azure Storage account configured to host our application, we need to build an automated pipeline to deploy new builds to the desired storage account. We will do this by using the Releases pipeline in Azure DevOps.
Similar to Continuous Integration (which we covered Lesson 1.9), we will follow the concept of Continuous Delivery (CD), an extension to continuous integration to make sure that we can release new changes to our customers quickly in a sustainable way. This means that on top of having automated our testing, we also have automated our release process, and we can deploy our application at any point in time at the click of a button.
In theory, with continuous delivery, we can decide to release daily, weekly, fortnightly, or whatever suits our game’s needs. However, if we truly want to get the benefits of continuous delivery, we should deploy to production as early as possible to make sure that we release small batches that are easy to troubleshoot in case of a problem.
Our CD pipeline will be very simple. We will take the latest good build (which builds successfully and all tests pass), and copy the wwwroot folder from the build folder to our Azure Storage $web container (which we configured in lesson 5.2).
Update Blazor Build Pipeline
Currently our Azure DevOps build zips the build output for all of our projects and copies them to the Drop folder, so that it is accessible to the release pipeline. However, we actually need the build output unzipped to copy it our Azure Storage container. So we are going to update the /build/azure-pipelines.yml file in our source tree.
# Starter pipeline
# Start with a minimal pipeline that you can customize to build and deploy your code.
# Add steps that build, run tests, deploy, and more:
# https://aka.ms/yaml

trigger:
- '*'

# all of the variables used by this pipeline and dependent templates.
variables:
  buildConfiguration: 'Release'
  dotnetSdkVersion: '3.1.200'
  releaseBranchName: 'main'
  localPackageFeed: 'd20Tek'

# define the image to use for the whole pipeline... can be overridden by specific jobs.
pool:
    vmImage: 'ubuntu-16.04'

stages:
# Build
- stage: 'Build'
  displayName: 'Build app'
  jobs:
  - job: 'Build'
    displayName: 'Build job'

    steps:
    # ensure the right version of .NET Core is installed -- defaults to 3.1.
    - task: UseDotNet@2
      displayName: 'Use .NET Core SDK $(dotnetSdkVersion)'
      inputs:
        version: '$(dotnetSdkVersion)'

    # restore NuGet packages used by the projects.
    - task: DotNetCoreCLI@2
      displayName: 'Restore project dependencies'
      inputs:
        command: 'restore'
        projects: '**/*.csproj'
        feedsToUse: 'select'
        vstsFeed: '$(localPackageFeed)'

    # build all projects in this repo... defined by folders with .csproj files.
    - task: DotNetCoreCLI@2
      displayName: 'Build the project - $(buildConfiguration)'
      inputs:
        command: 'build'
        arguments: '--no-restore --configuration $(buildConfiguration)'
        projects: '**/*.csproj'
        versioningScheme: byBuildNumber

    # publish all artifacts from the builds.
    - task: DotNetCoreCLI@2
      displayName: 'Publish the project - $(buildConfiguration)'
      inputs:
        command: 'publish'
        projects: '**/*.csproj'
        publishWebProjects: false
        arguments: '--no-build --configuration $(buildConfiguration) --output $(Build.ArtifactStagingDirectory)/$(buildConfiguration)'
        zipAfterPublish: true

    # runs tests for all projects in this repo... defined by folders with .Test.csproj files.
    - task: DotNetCoreCLI@2
      displayName: 'Run unit tests - $(buildConfiguration)'
      inputs:
        command: 'test'
        arguments: '--no-build --no-restore --configuration $(buildConfiguration)'
        # publish the test pass/fail results to the pipeline, so that they are available in the Azure DevOps pipeline dashboard.
        publishTestResults: true
        projects: '**/*.Tests.csproj'

    # publish the artifacts created by this build in the drop location.
    - task: PublishBuildArtifacts@1
      displayName: 'Publish Artifact: drop'
      condition: succeeded()
We just updated the zipAfterPublish to set in the Publish command to false, so that our build output doesn’t get zipped up on its way to the Drop folder.
Setup CD Pipeline
With Azure Pipelines, we are going to create a Release pipeline to manage when releases get deployed to Azure. In Azure DevOps, go to the Pipelines tab and click the releases button.

Click the ‘New Pipeline’ button.
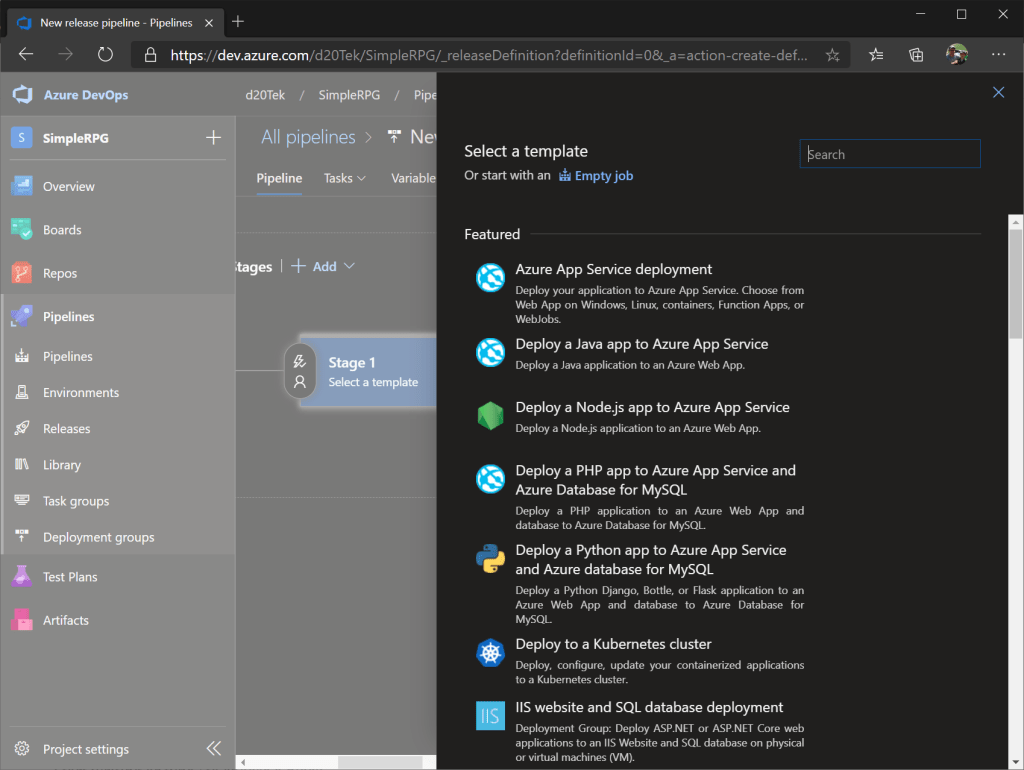
Click the ‘Empty Job’ link at the top of the flyout.
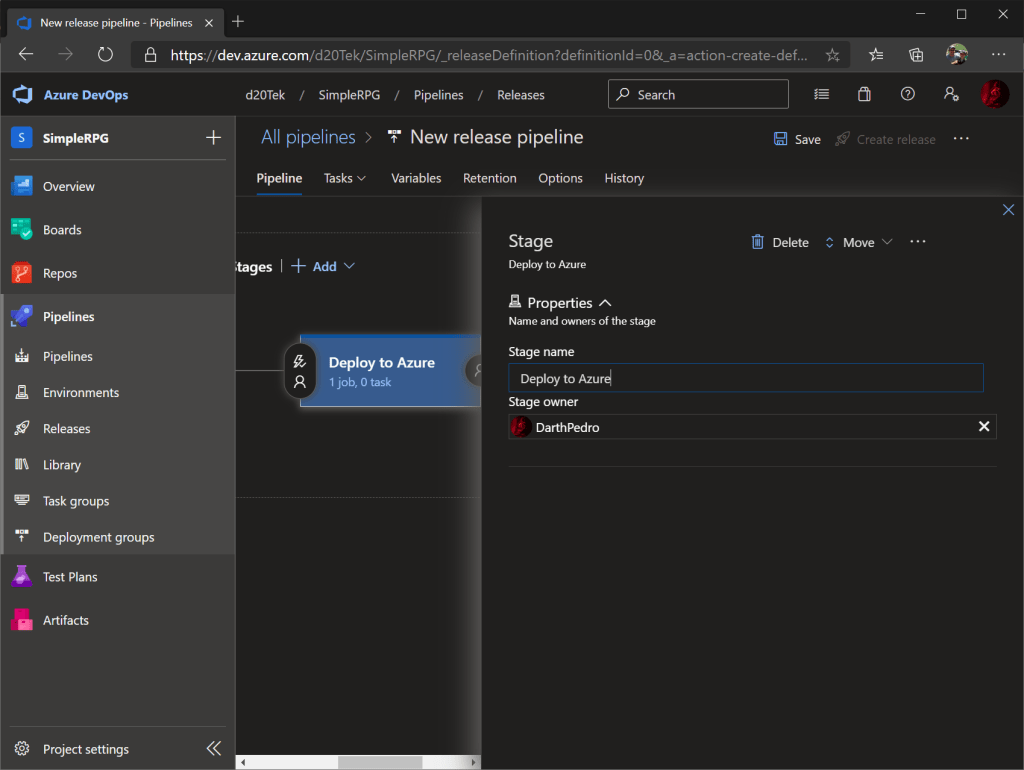
Rename the default stage to ‘Deploy to Azure’ and close this flyout.

Click the ‘Add an artifact’ box.

Select a build in our current project. Select the build pipeline to use: ‘simple-rpg-game-ci’. Then it defaults to the latest version. With all of this data selected, press the Add button.
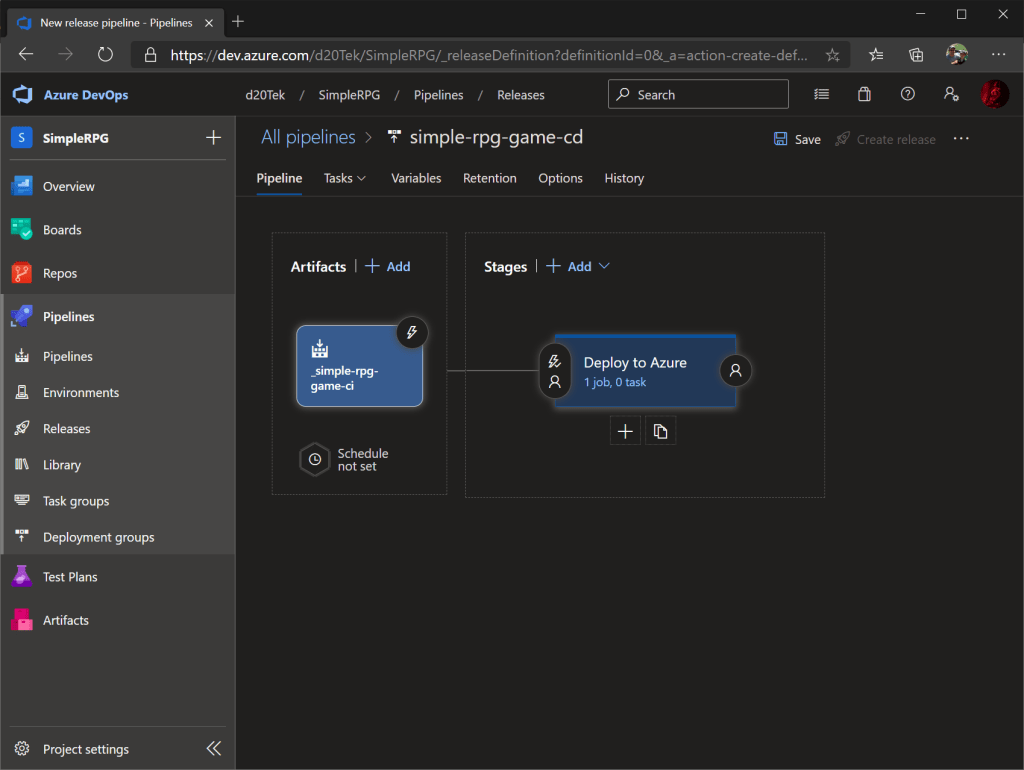
We should see the artifact added to our pipeline. Now we click on the ‘Tasks’ menu item and select ‘Deploy to Azure’.
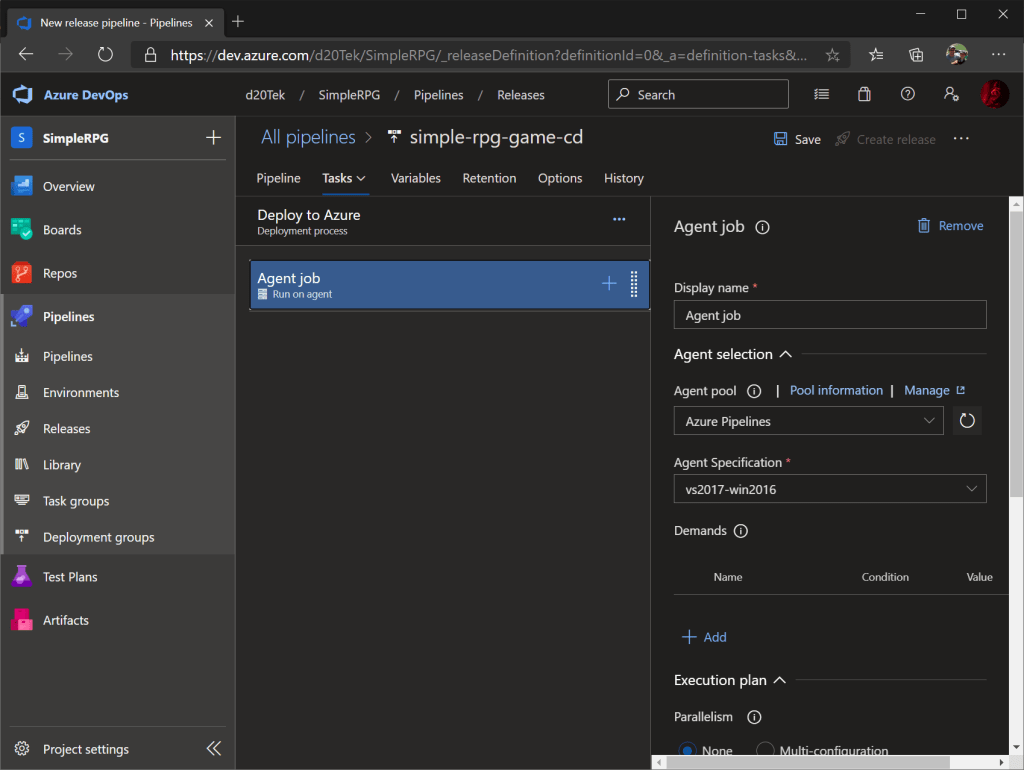
That will open the tasks for this pipeline, so far it should be empty. By selecting the ‘Agent job’ box, we can see all of the properties of our deployment agent. We’re not going to change any of the defaults, but it’s good to familiarize ourselves with the options here.
Then click the ‘+’ sign in the Agent job title bar to Add New Task.

Search for the ‘Azure file copy’ release task. This task is used to copy the files from our build output to the Azure Storage container that we created in lesson 5.2. Click the Add button on this task. This will open the following empty task.
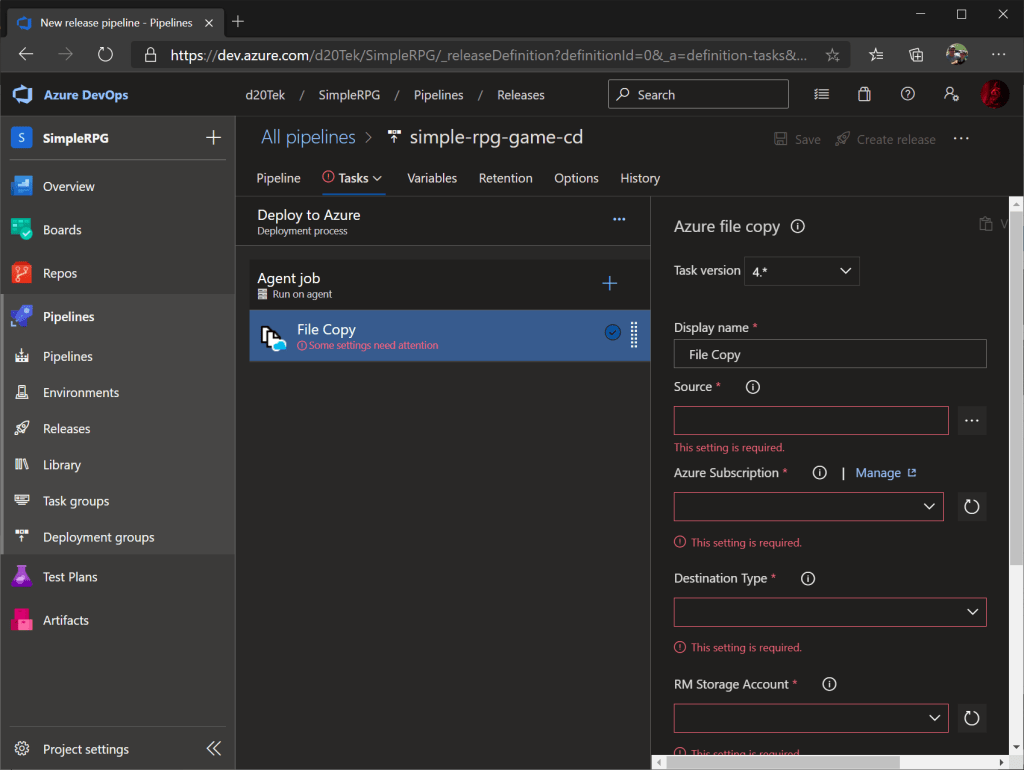
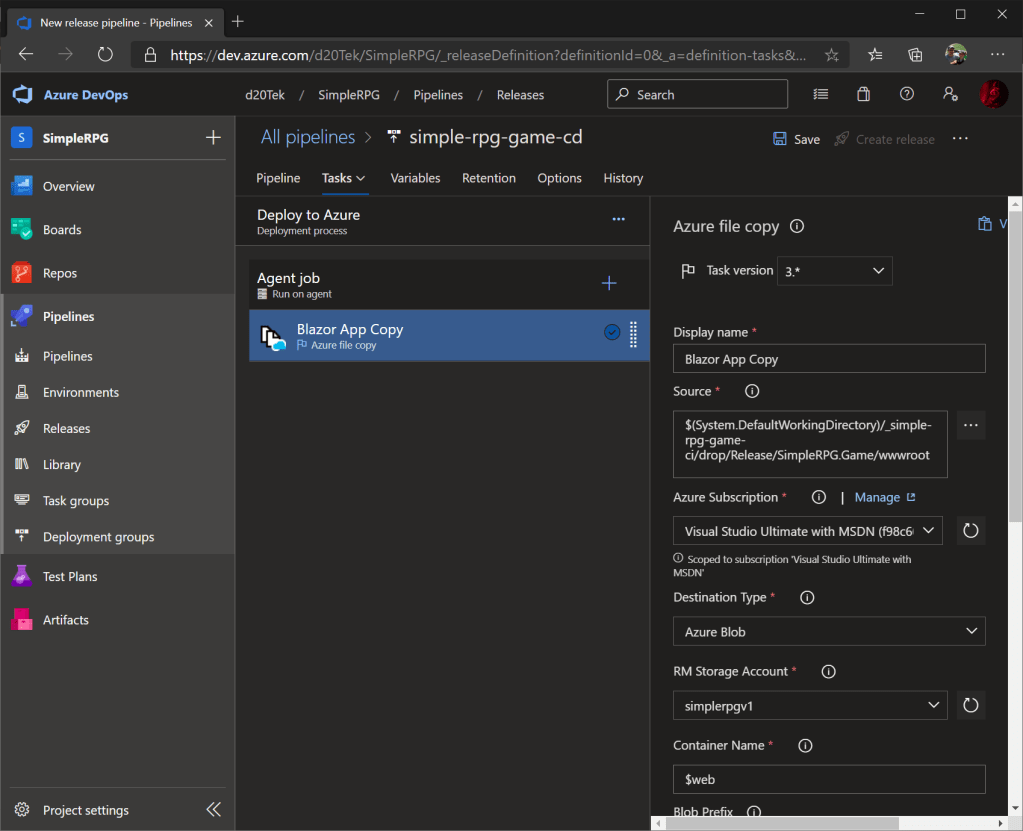
Fill in the required information for this form:
- Display Name: friendly name for this task.
- Source: full path to the build source folder. The path goes to the drop and release folders and all the way down to the wwwroot folder (this is where all of our content and assemblies are placed during the build).
- Azure Subscription: brings up a UI to connect to Azure using our credentials, then saves it for this release job.
- Destination Type: for our use it’s Azure Blob.
- Storage Account: this is the storage account we created previously – simplerpgv1.
- Container Name: remember the container we created was named $web.
- The remaining configuration entries are just the defaults.
Then click the Save button in the top bar. And let’s go back to the Release pipelines page by clicking the Releases link in the navigation bar.

Run First Release
With the release pipeline now in place, we can create and run our first release. This will get our initial version of the game to our public endpoint. To do this, click the ‘Create Release’ button to start a release of our current build.

Just click the Create button… no changes are required for this flyout at this time. This will launch the release job and attempt to deploy the latest simple-rpg-game-ci build to our Azure location. Allow it to run until you see it complete.
As you can see the release is named ‘Release-1’, and new ones will follow the same naming pattern.
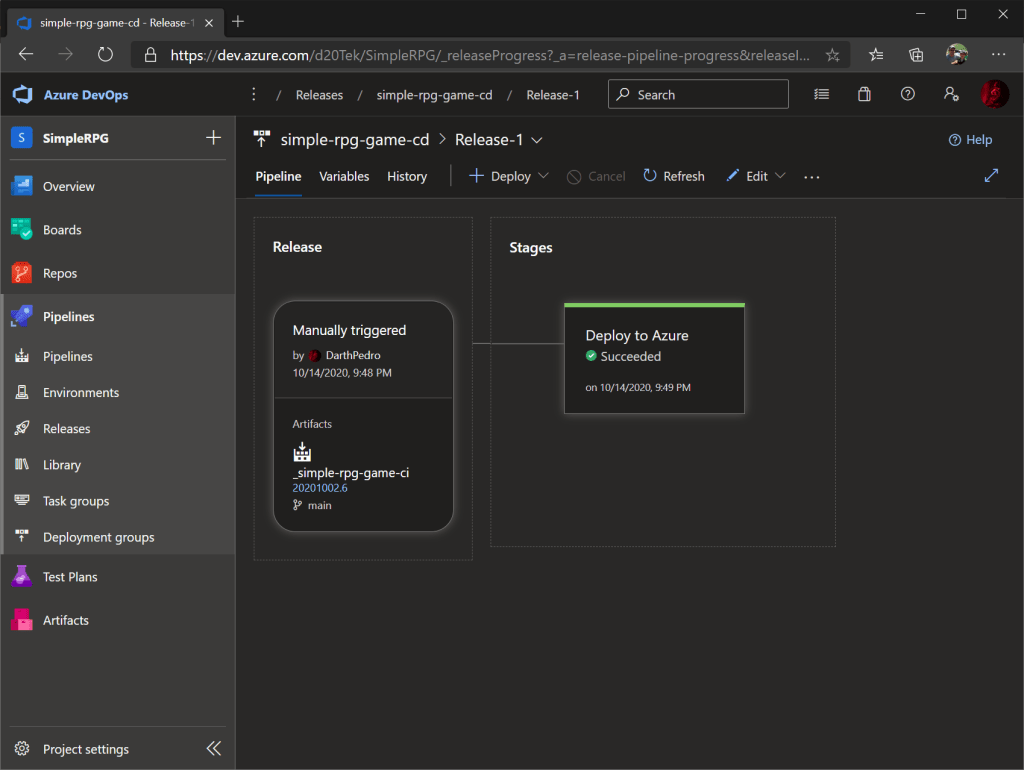
With the release complete, we now have our game deployed in our Azure storage account. It is ready for users to access it by navigating to the https://bit.ly/simple-rpg-v1 URL.
Note: we will be running through the steps in this section every time we want to deploy a new build into our production environment, so get familiar with the deployment steps.

Notice the URL at the top of the browser is pointing at our public Azure endpoint. Our game is now running from that Azure location and accessible to all of our players. We are live on the web!!!
Now, we can make changes to our game code, check it into our DevOps Git repository, automatically start a continuous integration build, and then start another release to get it live in Azure. We have come a long way from creating our new project and have automated our whole pipeline. We can use this CI/CD infrastructure in all of our apps, services, and components.
Note: we can add triggers to automatically deploy every build to our Azure container as well, but rather than doing it completely automatic, we are going to require someone to create a new release. There’s a lot of compelling arguments about whether automatic deployment into productions is a good idea or not. But later, if we want to automate this final step as well, we can easily do it with Azure DevOps.
With our Continuous Delivery pipeline in place, we’re hosting our Blazor game in Azure. That’s very exciting. We will continue our tour of Azure services by looking at Azure Functions, and how we can use it to build web services for our game data.

2 thoughts on “Lesson 5.3: Create Continuous Delivery Pipeline for Blazor app”