As we discussed in the introduction to this chapter, we will be learning how to use Azure Functions to build the web services for our game. Azure has several compute and hosting options to pick from, but since we’re investigating the serverless options, Azure Functions makes the most sense. But let’s take a quick look at all of other Azure compute options:
- App Service. A managed service for hosting web apps, mobile app back ends, RESTful APIs, or automated business processes… running full ASP.NET Core app or api.
- Azure Kubernetes Service (AKS). A managed Kubernetes service for running containerized applications… running full ASP.NET Core app or api.
- Batch. A managed service for running large-scale parallel and high-performance computing (HPC) applications
- Container Instances. The fastest and simplest way to run a container in Azure, without having to provision any virtual machines and without having to adopt a higher-level service.
- Functions. A managed FaaS service.
- Service Fabric. A distributed systems platform that can run in many environments, including Azure or on premises… running full ASP.NET app or api.
- Virtual machines (IaaS). Deploy and manage VMs inside an Azure virtual network… running full ASP.NET Core app or api, but developers own the VM and any updates to it.
Azure Functions allows us to run small pieces of code (called “functions”) without worrying about the application infrastructure. With Azure Functions, the cloud provider infrastructure provides all the up-to-date servers we need to keep our application running at scale.
A function is triggered by a specific type of event. Supported triggers include responding to changes in data, responding to messages, running on a schedule, or as the result of an HTTP request (which is the option we will use to build our web service).
Some key features of Azure Functions include:
- Serverless applications: Functions allow us to develop serverless applications on Azure.
- Choice of language: Write functions using: C#, Java, JavaScript, Python, and PowerShell.
- Pay-per-use pricing model: Pay only for the time spent running our code.
- Bring your own dependencies: Functions supports NuGet and NPM, giving us access to our favorite libraries.
- Integrated security: Protect HTTP-triggered functions with OAuth providers such as Azure Active Directory, Facebook, Google, Twitter, and Microsoft Account.
- Simplified integration: Easily integrate with Azure services and software-as-a-service (SaaS) offerings (like CosmosDB, Azure Storage, LogicApps, EventHub, etc).
- Flexible development: Set up continuous integration and deployment through GitHub and Azure DevOps.
With all of those rich capabilities, Azure Functions is a great programming model for building our web services. So, let’s take a look at creating our first Azure Functions project.
New Service Repository
First, to help isolate our service code and create its own CI/CD pipelines, we are going to create a new repository for our game web services. We created our game repository way back in chapter 1, so let’s go through the steps of creating a new repository.
1. In your Azure DevOps project (https://dev.azure.com/d20Tek/SimpleRPG/_git/simple-rpg-game), go to the Repos tab. It will start in the simple-rpg-game repo, since it is the only one in your project.
2. Expand the ‘simple-rpg-game’ dropdown in the top-level breadcrumb. Then click the ‘New Repository’ menu item.

3. In the flyout, fill out the information for the new repository:

- Repository type: remains Git.
- Repository name: set to ‘simple-rpg-services’.
- Add README: stays on.
- .gitignore: set to VisualStudio (since that’s the toolset we’re using).
4. Click the ‘Create’ button to get a new repository.
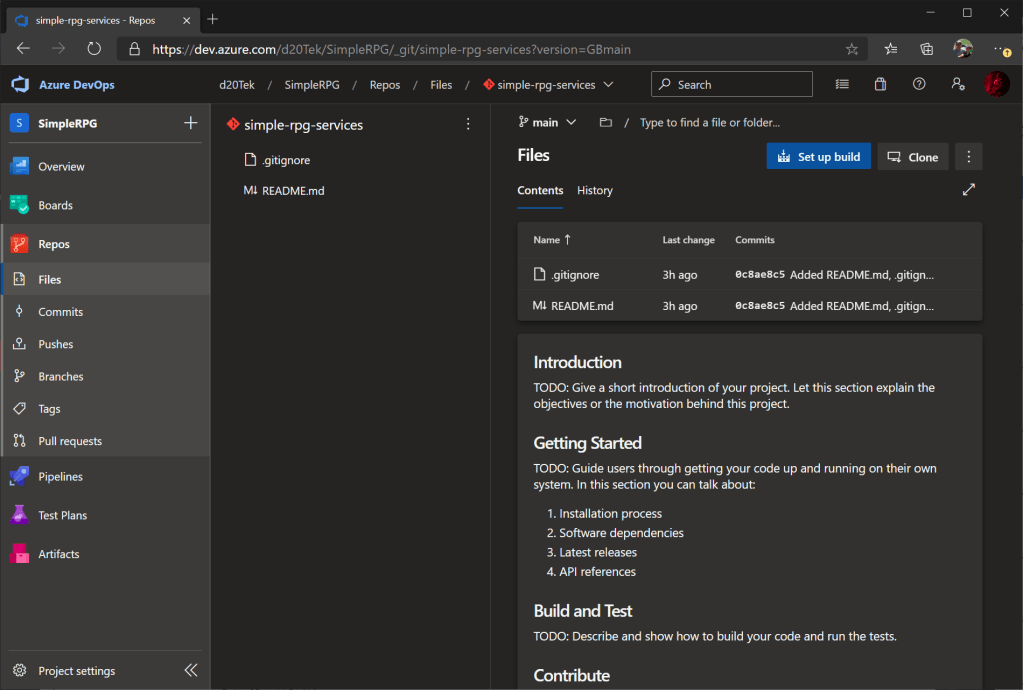
As we can see, we get a new repository with the same simple two files. Notice that this repository is still in our SimpleRPG project, but is separate from the simple-rpg-game repository. Copy the url to this repository, because we will need it to clone it locally.
We will also lock our main branch so that only pull requests (not direct commits) can be made to this branch. Let’s do that offline by following the steps in lesson 1.3 (the Branches section).
Clone Repository Locally
Now, in Visual Studio, let’s clone the new repository locally. When starting VS, the first thing we will see is a dialog where we can clone code, open projects, create projects, etc. We are going to start by cloning the Git repo we just created in the previous section. Click the Clone code button.
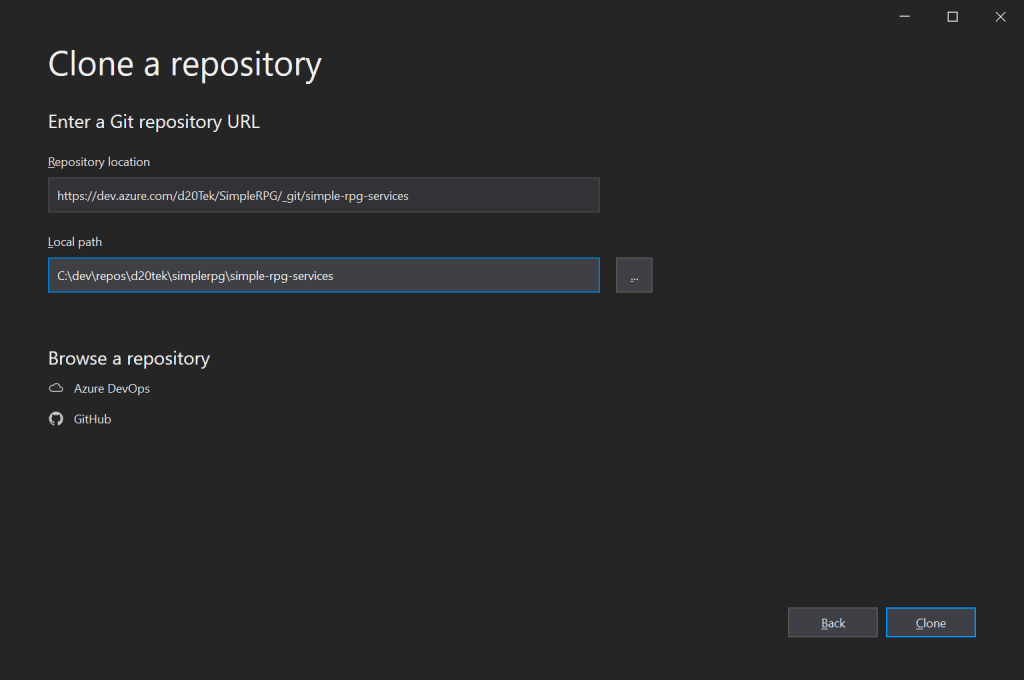
This will bring up a dialog where we:
- Specify the Repository location as a URL to our Azure DevOps repo. This is the URL to the project repository that we just created, like: https://dev.azure.com/d20Tek/SimpleRPG/_git/simple-rpg-services.
- Specify a local path where we want to copy the code to our local machine.
(I typically use a pattern like: c:\dev\repos\<org>\<project>\<repo> to organize my code locally. In this case, it would be: c:\dev\repos\d20tek\simplerpg\simple-rpg-services.) - Then click the Clone button at the bottom.
Switch into VS Team Explorer tool window, and then pick the Branches section. We are currently in the local main branch. Let’s create a new feature branch (remember we are not allowing direct commits to our main branch, so all work must be done in a feature branch, and then merged to the main branch via a pull request). Name the new branch ‘chapter-5’.

With our local working branch in place, we can start adding code.
New Azure Functions Project
We are going to create a new Azure Functions App that will contain the web service endpoints for our game services. Let’s do that by selecting File > New > Project in the main menu.

Search for the ‘Azure Functions’ project template, select it in the list, and press the Next button.
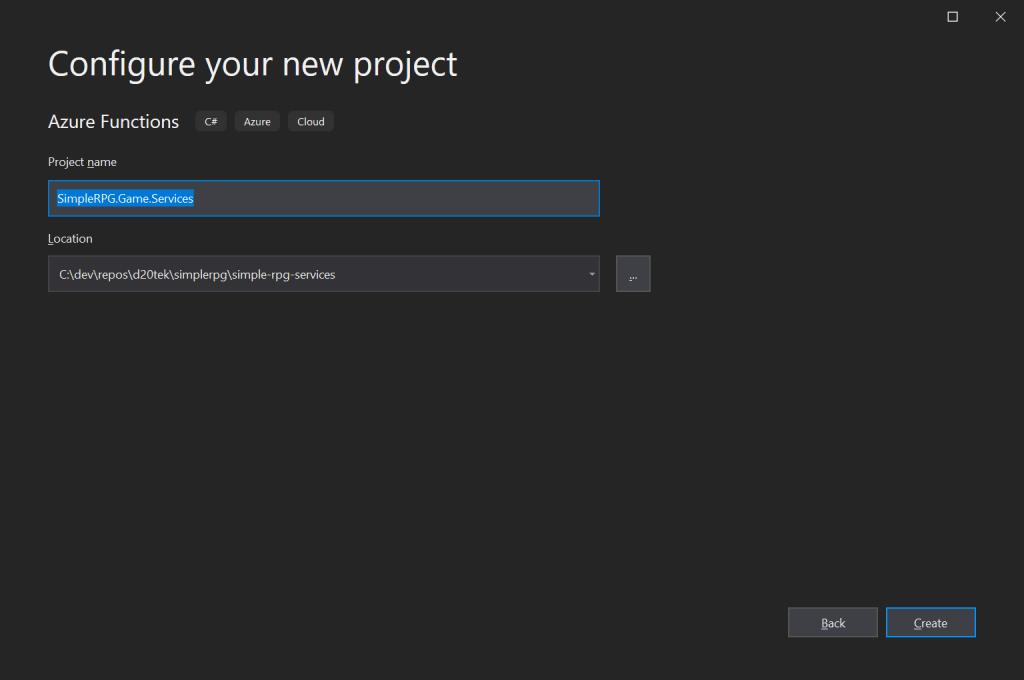
Name our Azure Functions project ‘SimpleRPG.Game.Services’ to following the naming convention we have used throughout the tutorial. Then press the Create button.
Then pick the appropriate trigger binding for this Azure Function. For our web service purposes, we are going to use Http Trigger to respond to an Http request from the client (our game).
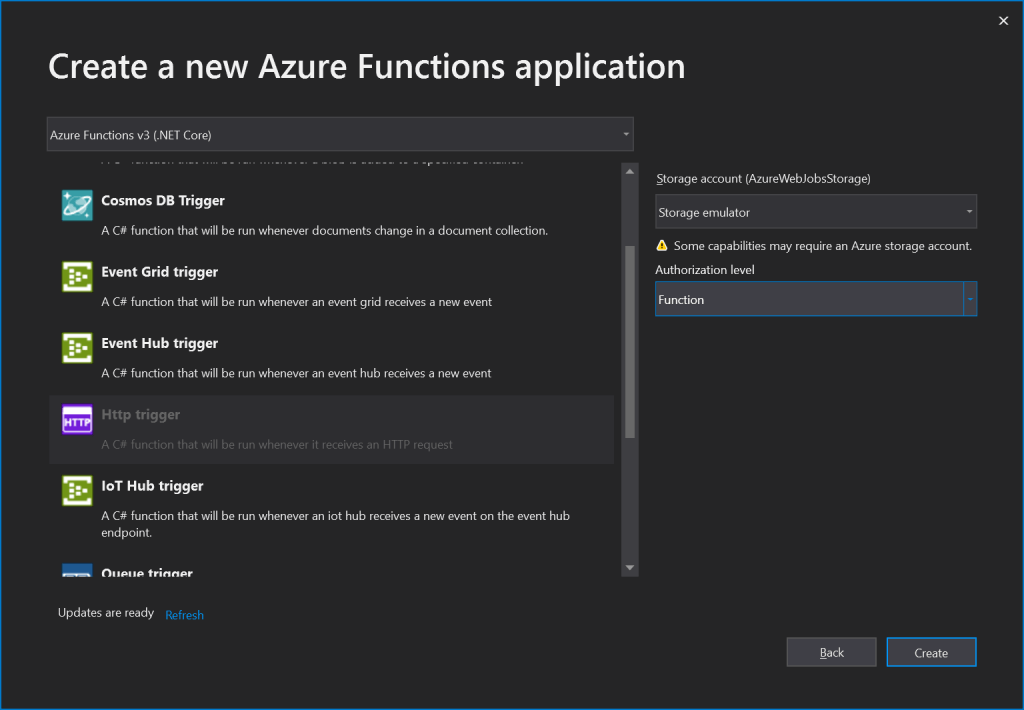
Again, press the Create button to proceed. When this template completes, we will have our first Azure Function simply called Function1 with a single Run method.
using System;
using System.IO;
using System.Threading.Tasks;
using Microsoft.AspNetCore.Mvc;
using Microsoft.Azure.WebJobs;
using Microsoft.Azure.WebJobs.Extensions.Http;
using Microsoft.AspNetCore.Http;
using Microsoft.Extensions.Logging;
using Newtonsoft.Json;

namespace SimpleRPG.Game.Services
{
    public static class Function1
    {
        [FunctionName("Function1")]
        public static async Task<IActionResult> Run(
            [HttpTrigger(AuthorizationLevel.Function, "get", "post", Route = null)] HttpRequest req,
            ILogger log)
        {
            log.LogInformation("C# HTTP trigger function processed a request.");

            string name = req.Query["name"];

            string requestBody = await new StreamReader(req.Body).ReadToEndAsync();
            dynamic data = JsonConvert.DeserializeObject(requestBody);
            name = name ?? data?.name;

            string responseMessage = string.IsNullOrEmpty(name)
                ? "This HTTP triggered function executed successfully. Pass a name in the query string or in the request body for a personalized response."
                : $"Hello, {name}. This HTTP triggered function executed successfully.";

            return new OkObjectResult(responseMessage);
        }
    }
}
Taking a closer look at the generated code:
- It defines a static class called
Function1(line 13), which holds our code. - Notice the
[FunctionName]attribute (line 15). This allows us to specify a public function name that is different from the method name. Note: without theFunctionNameattribute the public endpoint uses the method name. - Then defines a static method called
Run(line 16) that returns anIActionResult. This result returns whether the action succeeded or failed and theHttpResponse(when it succeeds). - The first parameter is the
HttpRequest(line 17), which includes everything that gets sent with a request… body, headers, query parameters, etc. - Also on that line, the
[HttpTrigger]attribute is used on that parameter. This maps the method to an Http Trigger at a particular route. The attribute states that this method requires Function-level authorization (using an application-key for the function), supports “GET” and “POST” operations, and no additional routing – just theFunctionName). - The second parameter is the
ILogger. Azure Functions integrates directly with Azure Monitoring, so using this logger, we can send log information that can be helpful later for debugging live-site issues in production. - The method body does some simple processing to try to get a name from the query string or request body. Then returns a message based on whether it found a name.
- The final line returns an OK result with the message body, so that callers get notified that the call succeeded.
We will keep this simple code just to verify our build and debugging tools. In the next lesson, we will replace this with our first real service code.
Build and Run Locally
Next, we are going to build this project by clicking Build > Build Solution on the main menu. Since we haven’t changed any code, it should build successfully.
At this point, press F5 to run our project. This will start the local Azure Storage Emulator and the Azure Function runtime. You should get a command prompt that looks like:

We will see information about the Function Runtime version, environment, path to the running .NET Core app. It also shows a list of Functions that are available. You will see that our Function1 is available, and its local URL. Let’s copy that URL and launch our Edge Browser.
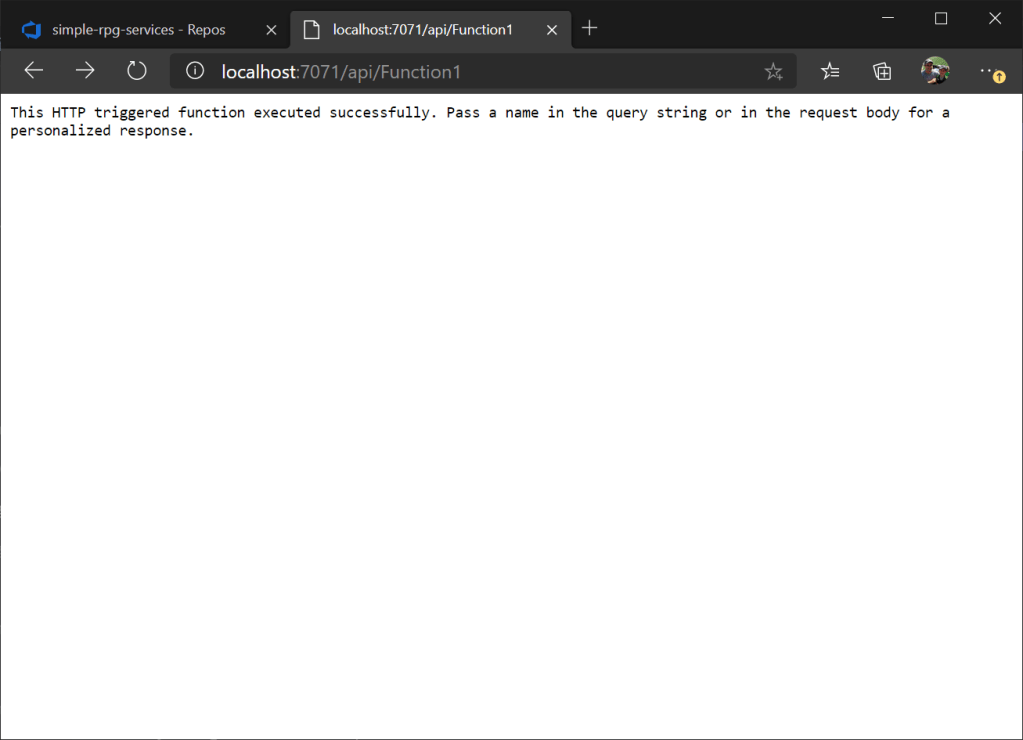
Since we ran it with no query string, it shows the default message. If we call it again using ?name=”DarthPedro” as the query string, we will get the following message.

If we return to our Azure runtime console window, we will see output tracing for each of the service calls that we made.

The information presented here can be very helpful to see which functions are getting called. And the individual function logging information is also printed to this console window.
With our first test complete, we return to Visual Studio and press Debug > Stop Debugging on the main menu. This will stop the Azure Functions runtime process and close the console window. If we try to run our service call again, it will now fail because the Azure Functions are no longer running locally.
Debug Locally
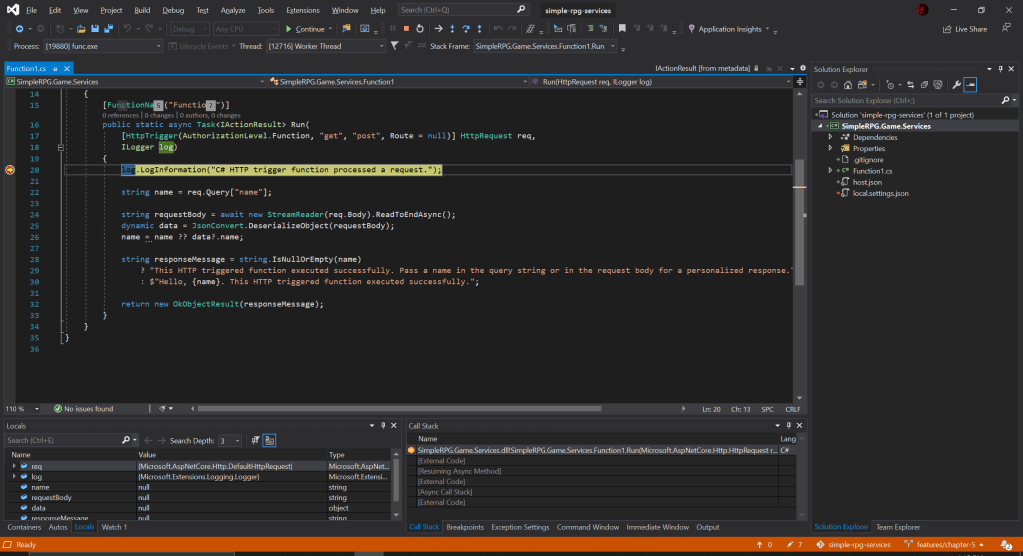
Just like we ran the function locally, we can also debug it. Let’s place a breakpoint in Function1.Run method (line 20).
When we start Debugging again by pressing F5, the Azure Runtime console window will launch again. We will again see our URL to our service.
Take the URL and launch it in the browser again. This time as the request is being processed, our breakpoint will be triggered. Visual Studio will jump to the breakpoint line, and we can start debugging our code from there. All of the powerful VS debugging tools are available to us at this point. Pressing F5 again will run the service from this breakpoint and show our default response message again.
This level of integrated debugging of serverless Azure Functions makes it a very productive environment for developers. We can quickly code our function logic, test it locally, and debug logic errors that we encounter. This tight loop of coding, testing, and debugging is what makes us productive.
With our initial Azure Functions project in place, we can commit our code and get ready for the next lesson. In the next lesson, we are going to look at writing our first real Azure Function to return game item data.
