Before we get too far along in coding the Simple RPG game, we need to enable building and running unit tests for our project. I’ve followed various forms of TDD (test-driven development) over the years. And I’m not a purest about writing tests prior to writing code. But I do firmly believe in creating tests as you build our system/game. They are proof that our code performs the intended operations, and they help us flesh out edge cases that must be handled in our code. Also when we come back to our code months later, they help us remember what our code intent was and are a test bed for any changes we are about to make.
We are going to want to create tests to validate the features of our game. So let’s add a unit test project to our simple-rpg-game solution.
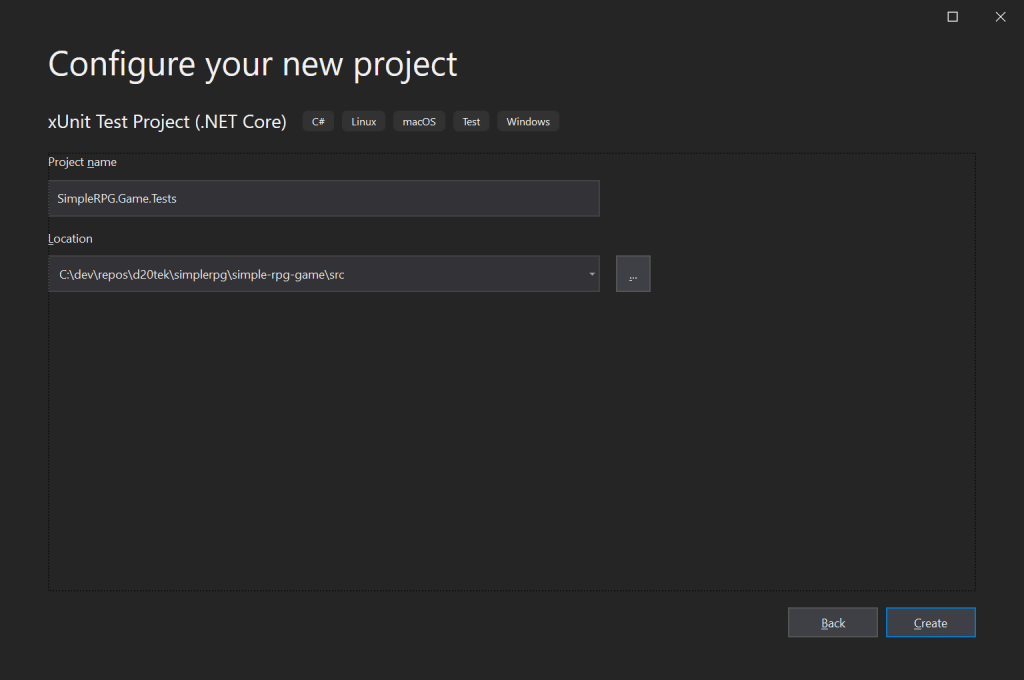
Add xUnit Test Project
I have also used different unit test frameworks over the years. I have a lot of experience with the MSTest framework. But for this project, we’re going to try a different one (that I have also used in the past). xUnit is one of the most popular unit test frameworks out there, so we’re going to use that library.
Right click on the solution (in Solution Explorer), and select Add > New Project. Then, search for xUnit Test Project. Select xUnit Test Project (.NET Core) in C#, and click the Next button.

Then enter the appropriate project name (SimpleRPG.Game.Tests) in the next page of the wizard, and click the Create button. By convention, I use the same name as the original project with “.Tests” appended to it. This makes it easy to see which test projects that are associated with which source project.
This will create our test project and a new test class file. I usually just delete that class and get ready to create test classes for my project.
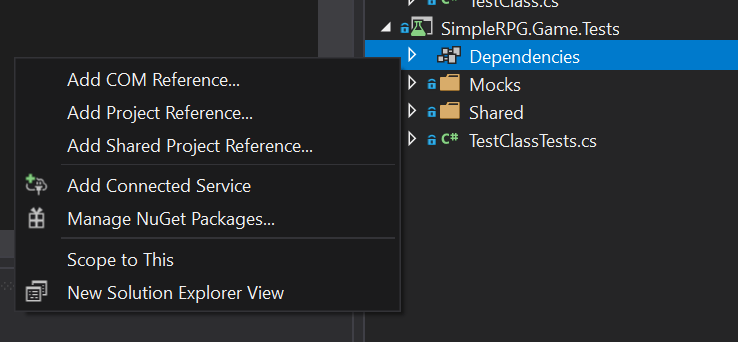
Next, we need to reference the game project in our tests. This allows our test project to access public types in the game project. Right click on the Dependencies folder in the test project, and then select Add Project Reference.
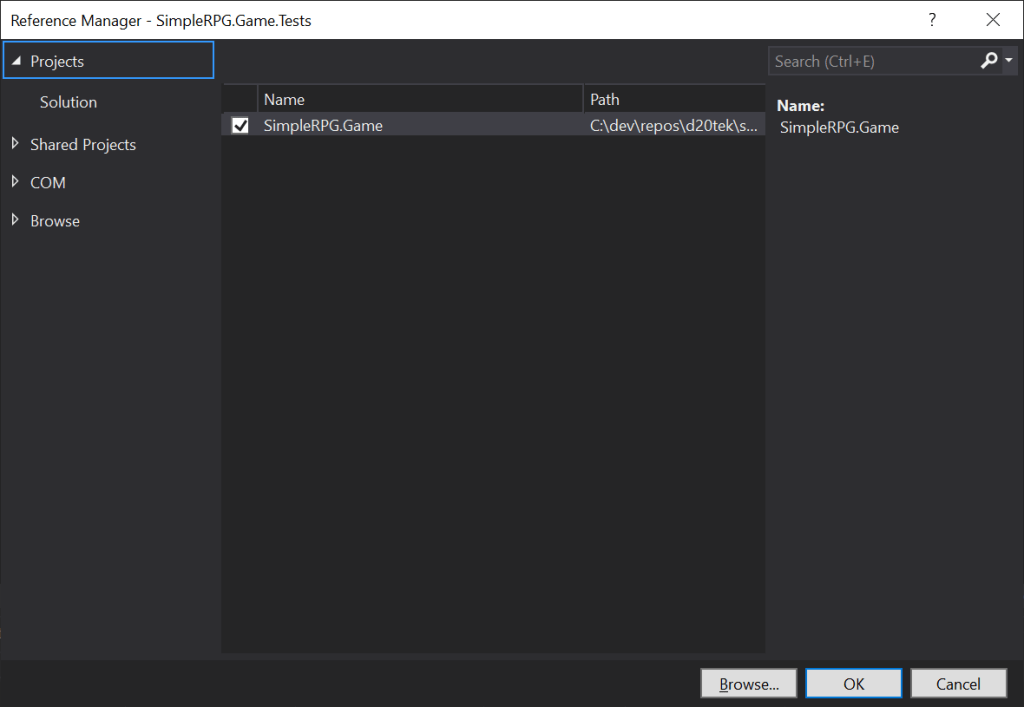
Then check the SimpleRPG.Game project and click OK.
Adding First Unit Test
We’re going to add a simple class to test in the game project so that we can then validate the xUnit project. Add a TestClass.cs file to the SimpleRPG.Game with the following code:
namespace SimpleRPG.Game
{
    public class TestClass
    {
        public string Name { get; private set; } = string.Empty;

        public bool DoSomething(string value)
        {
            this.Name = value;
            return true;
        }
    }
}
Then, in the test project (SimpleRPG.Game.Tests), create a new C# file named TestClassTests.cs. By convention, I usually name the test class with <class-name>Tests class. This makes it easy to find the matching source and test files. In that class, add the first test:
using Xunit;

namespace SimpleRPG.Game.Tests
{
    public class TestClassTests
    {
        [Fact]
        public void DoSomething_Test()
        {
            // arrange
            var cut = new TestClass();

            // act
            var result = cut.DoSomething("TestAbc");

            // assert
            Assert.True(result);
            Assert.Equal("TestAbc", cut.Name);
        }
    }
}
Here are some items of interest with the test code:
- The test class must be public to be discovered by the test framework.
- The test method must have the [Fact] attribute on it.
- Our tests follow the structure:
- arrange – setup the prerequisites for the test.
- act – perform the actual test on the method.
- assert – validate the results of the method being tested.
- Keep the tests independent from one another so that they run consistently.
Now we are ready to cleanly build both projects.
Running the Tests
After our code and tests are built, we can run the tests inside of Visual Studio.
If we haven’t done it before, open up the Test Explorer by going to the main menu and selecting Test > Test Explorer.
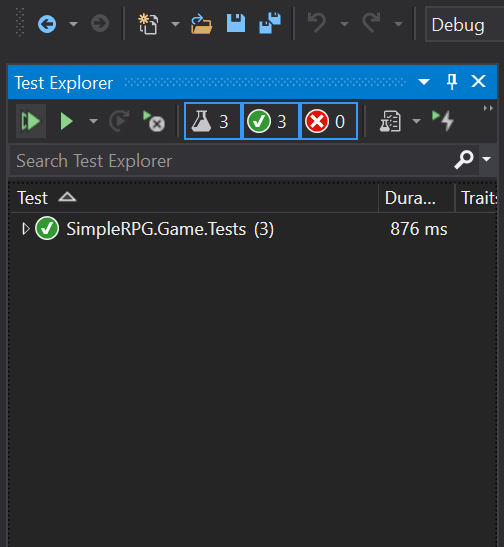
Then, click on the Run All Test button (the left-most button on the toolbar). This will rebuild our code (if that’s needed), and then run the tests. For the first test, everything should run cleanly.

We can navigate down the tree to see individual test results. The green checkmark means the test succeeded. If the tests fail, we will see a red X next to the failing test. Play around with the Test Explorer, it has lots of features to help us run and debug our tests.
In conclusion, we now have:
- Our game and test projects.
- Our first unit test.
- And a passing test.
When we get to a good logical breakpoint like this, with all of our tests passing, it’s always a good time to commit our changes. Before we move to the next step.
Note: I will be adding unit tests throughout the development of the Simple RPG game. We won’t discuss all of the tests but we can review them in the Git repository. We will definitely highlight any important tests as we go.

One thought on “Lesson 1.7: Adding Unit Test Project”