We are going to complete the MVVM cycle by defining the view for our game – the Game Screen – to display and interact with the GameSession view model and the Player class. As a reminder of the MVVM design pattern:

To enable the View portion of this pattern, we are going to: create an instance of the ViewModel and Player model class, then use databinding to bind elements on the razor page to properties in the model, and finally respond to events from the view.
Setup Steps
We’re going to follow a few quick steps to make our classes ready for consumption:
- Rename the ./Pages/Index.razor file to /Pages/MainScreen.razor. Index is a very web app specific term that we don’t want to continue to use in our lessons.
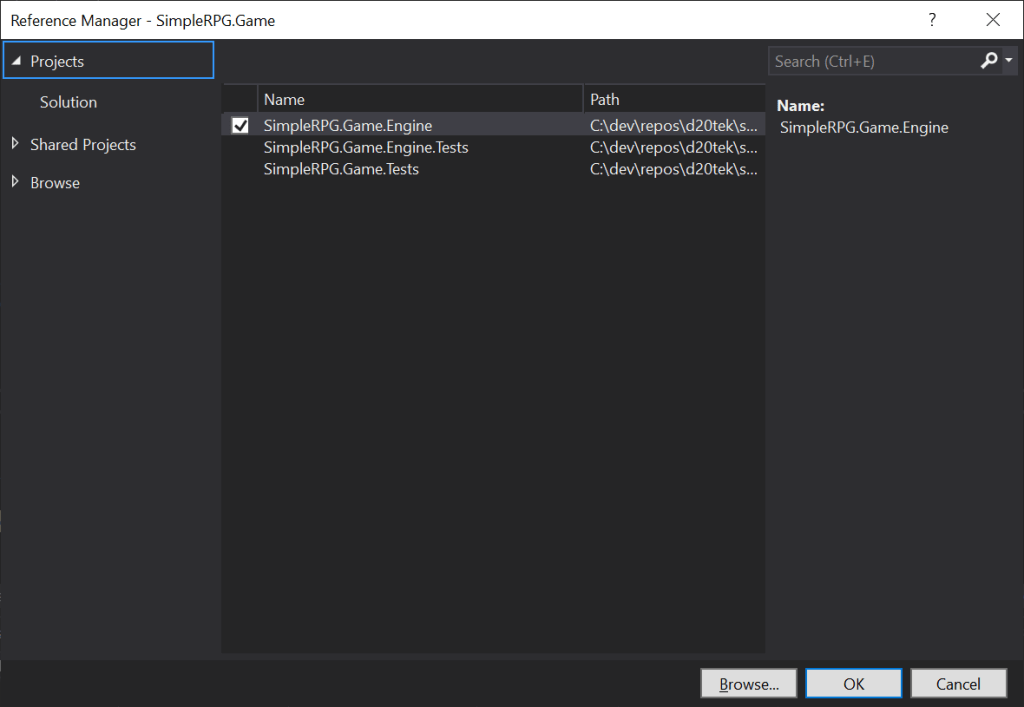
- Make SimpleRPG.Game project have a project reference to SimpleRPG.Game.Engine, so that we can access its public types.
- Update the _Imports.razor file to include
@usingcommands for game engine namespaces. Remember that this makes our Models and ViewModels namespaces available to all razor files in our project.
@using SimpleRPG.Game.Engine.Models
@using SimpleRPG.Game.Engine.ViewModels
- Update the
GameSessionconstructor to create a fully definedCurrentPlayerobject.
    public GameSession()
    {
        this.CurrentPlayer = new Player
        {
            Name = "DarthPedro",
            CharacterClass = "Fighter",
            HitPoints = 10,
            Gold = 1000,
            ExperiencePoints = 0,
            Level = 1
        };
    }
Creating the View With Data-Binding
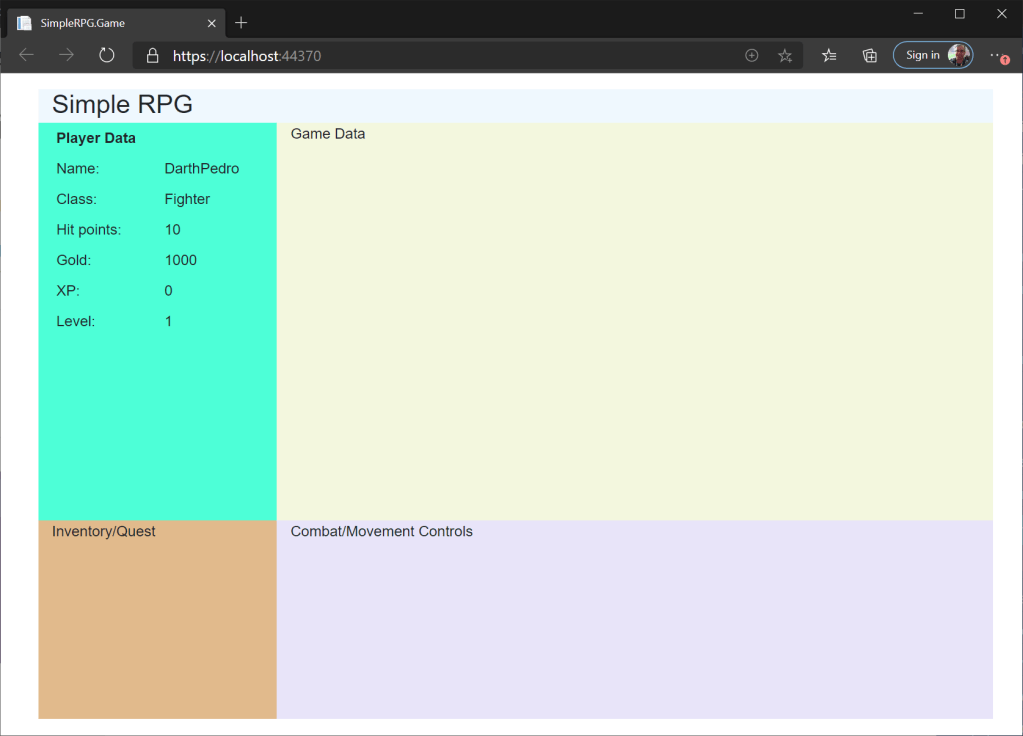
Now, we can edit the MainScreen.razor file to create a GameSession view model and use databinding. We will update the Player Data section of the screen to actually show player information like Name, Class, Hit points, etc.
Let’s take a look at the full page of code:
@page "/"

<Row Style="height: 5vh; min-height: 32px">
    <Column ColumnSize="ColumnSize.Is12" Style="background-color: aliceblue">
        <Heading Size="HeadingSize.Is3">Simple RPG</Heading>
    </Column>
</Row>
<Row Style="height: 60vh">
    <Column ColumnSize="ColumnSize.Is3.OnWidescreen.Is12" Style="background-color: aquamarine">
        <Table Borderless="true" Narrow="true">
            <TableHeader>
                <TableHeaderCell RowSpan="2">Player Data</TableHeaderCell>
            </TableHeader>
            <TableBody>
                <TableRow>
                    <TableRowCell>Name:</TableRowCell>
                    <TableRowCell>@ViewModel.CurrentPlayer.Name</TableRowCell>
                </TableRow>
                <TableRow>
                    <TableRowCell>Class:</TableRowCell>
                    <TableRowCell>@ViewModel.CurrentPlayer.CharacterClass</TableRowCell>
                </TableRow>
                <TableRow>
                    <TableRowCell>Hit points:</TableRowCell>
                    <TableRowCell>@ViewModel.CurrentPlayer.HitPoints</TableRowCell>
                </TableRow>
                <TableRow>
                    <TableRowCell>Gold:</TableRowCell>
                    <TableRowCell>@ViewModel.CurrentPlayer.Gold</TableRowCell>
                </TableRow>
                <TableRow>
                    <TableRowCell>XP:</TableRowCell>
                    <TableRowCell>@ViewModel.CurrentPlayer.ExperiencePoints</TableRowCell>
                </TableRow>
                <TableRow>
                    <TableRowCell>Level:</TableRowCell>
                    <TableRowCell>@ViewModel.CurrentPlayer.Level</TableRowCell>
                </TableRow>
            </TableBody>
        </Table>
    </Column>
    <Column ColumnSize="ColumnSize.Is9.OnWidescreen.Is12" Style="background-color: beige">
        Game Data
    </Column>
</Row>
<Row Style="height: 30vh">
    <Column ColumnSize="ColumnSize.Is3.OnWidescreen.Is12" Style="background-color: burlywood">
        Inventory/Quest
    </Column>
    <Column ColumnSize="ColumnSize.Is9.OnWidescreen.Is12" Style="background-color: lavender">
        Combat/Movement Controls
    </Column>
</Row>

@code {
    private GameSession ViewModel = new GameSession();
}
First, the section with the @code directive allows us to define C# code within the component itself. We can write arbitrarily complex code within a component, but in general we will try to keep most of the application logic out of components and pages and in ViewModels or other C# classes (that are easier to test in isolation). But some glue code and UI specific code will be written here. Remember that maintaining a good separation of user interface and game logic is a fundamental pattern that we will follow throughout these lessons.
In this code section, we are only creating an instance of the GameSession class and exposing it to the rest of the page as the ViewModel property (data-binding within this page will reference the property).
Then, our top-left section of the game screen has been augmented to include a <Table>. Within the table we are showing the ViewModel.CurrentPlayer information. Let’s dive deeply into the Table layout.
    <TableHeader>
        <TableHeaderCell RowSpan="2">Player Data</TableHeaderCell>
    </TableHeader>
<TableHeader> is a special row at the top of a Table. We just use the “Player Data” text as the label here and set the RowSpan property to 2, so that this header goes across the whole table (since it is a two-column table). The header is then followed by multiple <TableRow> elements. Let’s just look at the first row.
    <TableRow>
        <TableRowCell>Name:</TableRowCell>
        <TableRowCell>@ViewModel.CurrentPlayer.Name</TableRowCell>
    </TableRow>
The row then has two columns defined by each <TableRowCell>. By default the columns size themselves based on the width of the table and the content of each column. The first cell is just a simple text label (“Name:”). The second cell is also a text label, but notice the @ViewModel.CurrentPlayer.Name code. The @ symbol tells ASP.NET & Blazor that we are binding this element’s content to the value of that object and property. This is an example of a simple one-way databinding in Blazor — data goes from the property to the element.
Name is a string property, but you can also bind to non-string datatypes, like the player’s hit points.
<TableRowCell>@ViewModel.CurrentPlayer.HitPoints</TableRowCell>
By default, the binding calls an object’s ToString method to get a string representation for value types (like integer), which translates the value to a string. For more complex types, it may just show the name of the type, which is not very useful in a UI. A developer can override Object.ToString to give a better experience with their type, or we will investigate other type conversion strategies in future lessons.
The remainder of the table repeats this pattern for all of the Player properties. Now, let’s build and run our game again to see the new UI elements.
Responding to an Event
Next, we are going to update the Player data object and watch it update on the screen. To show this, we are going to add a button after the Player Data <Table> in the MainScreen.razor file.
<Button Color="Color.Secondary" Outline="true" Clicked="@ViewModel.AddXP">Add XP</Button>
The <Button> component places an HTML button with the Color and Outline style specified. The third attribute on button represents the Clicked event handler. When the button.onclick event is fired, we forward the event to the GameSession.AddXP method. We use the same binding syntax for this event handler because we are binding the Clicked event to the AddXP handler method. We do need to understand that the Clicked event requires a method with void return and no parameters to bind correctly.
We also need to add this method to the GameSession class to get the MainScreen to compile:
using SimpleRPG.Game.Engine.Models;

namespace SimpleRPG.Game.Engine.ViewModels
{
    public class GameSession
    {
        public Player CurrentPlayer { get; set; }

        public GameSession()
        {
            this.CurrentPlayer = new Player
            {
                Name = "DarthPedro",
                CharacterClass = "Fighter",
                HitPoints = 10,
                Gold = 1000,
                ExperiencePoints = 0,
                Level = 1
            };
        }

        public void AddXP()
        {
            this.CurrentPlayer.ExperiencePoints += 10;
        }
    }
}
Now, every time the Add XP button is clicked the CurrentPlayer object gets their experience points incremented by 10 points. Let’s run the game to try it out… click the Add XP button a few times to see what happens:
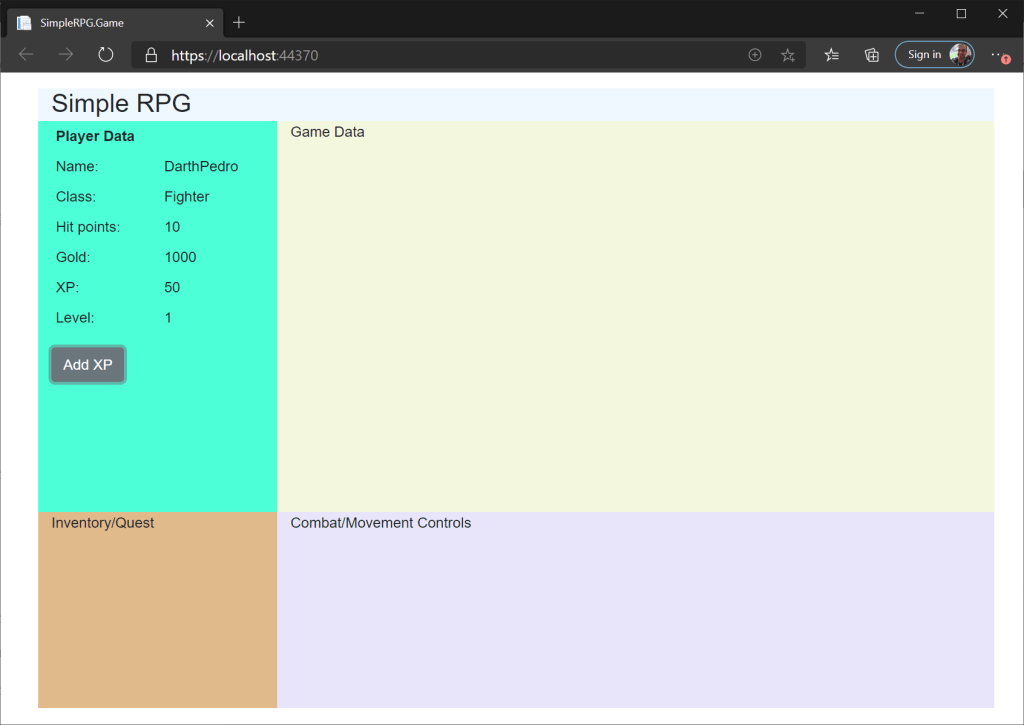
Notice that the XP row of the table updates with the new value of CurrentPlayer.ExperiencePoints on every button click.
Blazor data-binding does some work under the covers to make this work… updates to the underlying property are reflected in the UI components by re-rending that section of the page when it detects a change. Blazor does a great job of enabling patterns, like MVVM, with a robust data-binding implementation
For those familiar with other MVVM frameworks on WPF or UWP, you probably remember having to implement INotifyPropertyChanged on model and view model classes to support updates data-bindings on those systems. But in Blazor, that is unnecessary, which really reduces some repetitive code in our libraries. It allows us to just use regular C# property implementations in most cases.
Also many MVVM frameworks require using ICommand objects to handle events. Blazor also simplifies event handlers to directly call ViewModel methods with the appropriate signature. While Blazor makes this easier, you can still define and use command objects for libraries that need to support multiple UI platforms.
We’ve come a long way with Blazor in this lesson. We learned about:
- creating a table using the Blazorise components.
- one-way databinding elements to properties.
- handling events in our ViewModel code.
- and changes to bound UI components when backing properties change.
Let’s do a final build, run our tests, and commit our changes before we proceed to the next lesson.

Hi great reading your blogg
LikeLike